The Cape Wrath Trail is an unmarked long-distance backpacking route through the northwest Highlands of Scotland, usually walked from Fort William to Cape Wrath lighthouse.
Covering roughly 220 to 250 miles depending on the route taken, it crosses remote glens, boggy moorland, mountain passes, river crossings, bothy country, and some of the wildest terrain in Britain.
Unlike official National Trails, there is no single fixed line to follow.
Hiking the Cape Wrath Trail requires strong navigation skills, wild camping experience, flexible planning, and the confidence to deal with difficult weather and remote terrain.
- Is the Cape Wrath Trail Right for You?
- The Need-To-Know for Hiking the Cape Wrath Trail
- Cape Wrath Trail Route Options and Variants
- Cape Wrath Trail Map, GPX and Navigation
- Cape Wrath Trail: A 14-Day Itinerary
- Resupply, Bothies and Wild Camping
- What to Pack to Hike the Cape Wrath Trail
- FAQ
- Summary
- Where to Next?
Is the Cape Wrath Trail Right for You?
The Cape Wrath Trail spans 230 miles from Fort William to a remote lighthouse at Cape Wrath, the most northwestern point of mainland Britain.
Walking these 230 miles takes a hiker and turns them into an explorer.
It’s not a simple but challenging hike; it’s a full-blown wilderness expedition through some of the most stunning yet unforgiving terrain in Europe.
While trails like the West Highland Way and other classics are on the register as official National Trails, the Cape Wrath Trail stands alone.
This means there are no waymarks, signposts, or even a single definitive route. It’s an adventure.
The concept of the trail started with explorer David Paterson in the early 1990s, and has stayed as a loose network of routes and different variants that connect the start and end.
With this, every hiker’s version looks just a little bit different. This creates a kind of freedom for hikers, but it also creates a massive challenge.
Through a succession of Scotland’s most wild regions like the Rough Bounds of Knoydart, the Torridon mountains, Assynt, and the trackless moorlands on the far northwest.
The trail takes you across rivers, through bods, up and over spectacular mountain passes, and past so much more.
Arriving at the Cape Wrath lighthouse is a spectacular accomplishment for those who take on the challenge of the trail.
This guide is made to help you plan your own Cape Wrath Trail adventure so you can join the league of adventurers and hikers alike who are looking for a more unique challenge.
Trail Snapshot
Location: Northwest Highlands, Scotland
Distance: Around 220–250 miles / 354–402 km, depending on route choice
Typical duration: 14–21 days
Start: Fort William
Finish: Cape Wrath lighthouse
Difficulty: Very difficult
Waymarking: Unmarked / no official route
Terrain: Bog, moorland, mountain passes, river crossings, estate tracks, rocky paths, coastal sections
Accommodation: Wild camping, bothies, occasional hostels, hotels and guesthouses
Best time: May to early June, or September for experienced hikers
Best for: Experienced backpackers wanting a remote, self-sufficient Scottish wilderness route
Not ideal for: Beginners, poor navigators, or hikers relying on regular accommodation and easy logistics
The Need-To-Know for Hiking the Cape Wrath Trail
The Cape Wrath Trail is not difficult because of one single mountain, climb, or technical section.
It is difficult because almost everything about it adds up: the distance, the bog, the weather, the navigation, the river crossings, the remote terrain, and the need to carry your own shelter and supplies.
This is not a trail where you can simply follow waymarks from village to village.
You need to be able to plan, adapt, and make safe decisions when the weather turns or the ground becomes harder than expected.
“Avoid rookie mistakes. Our free ebook Hiking for Beginners shows you how.”
Distance and Elevation
The Cape Wrath Trail covers roughly 220 to 250 miles, depending on the route and variants you choose.
Most hikers follow a line of around 230 miles from Fort William to Cape Wrath, but there is no single official route.
The total elevation gain is also deceptive. Across the full route, hikers may climb around 45,000 feet, but the challenge does not come from one huge ascent.
Instead, it comes from repeated climbs, rough descents, boggy ground, and long days with a fully loaded pack.
On paper, some days may not look extreme. On the ground, they can feel much harder because progress is slowed by mud, heather, wet feet, river crossings, and navigation.
Navigation on the Cape Wrath Trail
Navigation is one of the defining challenges of the Cape Wrath Trail. Unlike official National Trails, the route is not waymarked, and there is no single fixed line to follow.
You need to be confident using a map and compass, not just a phone app. GPS tracks and offline maps are useful, but they should support your navigation rather than replace it.
Batteries die, weather can reduce visibility, and poor conditions can make even obvious terrain harder to read.
Many hikers use a combination of Harvey Maps, the Cicerone guidebook, GPX files, and offline mapping apps.
Whatever system you choose, carry a backup and know how to use it before you start.
Terrain on the Cape Wrath Trail
The terrain is what gives the Cape Wrath Trail its reputation.
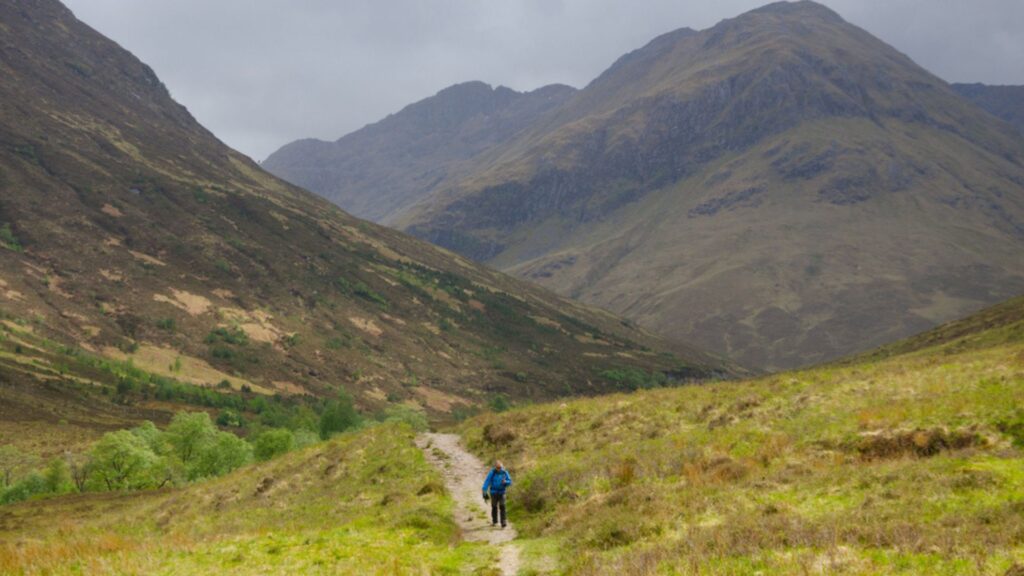
Expect a mix of estate tracks, faint paths, open moorland, peat bog, heather, rocky passes, river crossings, and rough hillside traverses.
Some sections are straightforward. Others are slow, wet, and mentally draining.
The hardest parts are often not steep in a dramatic mountain sense, but exhausting because there is no clean path underfoot.
You may spend hours crossing boggy ground where every step takes effort. In poor weather, this can become tiring quickly, especially with a heavy backpack.
River Crossings and Bad Weather
River crossings are one of the biggest practical hazards on the Cape Wrath Trail.
Many crossings are manageable in settled conditions, but heavy rain can turn them into serious obstacles.
If a river looks unsafe, do not force the crossing. Waiting, detouring, or changing your route may cost time, but it is often the correct decision.
This is why flexibility matters so much on the Cape Wrath Trail.
A fixed day-by-day plan can fall apart quickly if rivers rise, weather closes in, or terrain takes longer than expected.
Accommodation, Bothies and Wild Camping
Most Cape Wrath Trail hikers carry a tent and rely heavily on wild camping.
This gives you the flexibility to stop where conditions allow, rather than needing to reach a fixed village or accommodation each night.
Bothies can also be useful along the route, but they should never be treated as guaranteed accommodation.
They are basic shelters, often remote, first-come first-served, and may already be full when you arrive.
There are also occasional hotels, hostels, guesthouses, and villages along the way, including places such as Shiel Bridge, Strathcarron, Ullapool, Kylesku, Kinlochbervie, and Durness.
These can be valuable for resupply, drying gear, showering, and resting, but they require planning and may need to be booked ahead in summer.
Resupply and Food Planning
Food planning is more important on the Cape Wrath Trail than on many other UK long-distance walks.
There are long stretches with limited shops, and some villages have only small stores or limited opening hours.
You may need to carry several days of food at a time, especially through the more remote northern sections.
Lightweight, high-calorie food is essential because your pack will already be heavy with camping gear, waterproof layers, navigation tools, and safety equipment.
Do not assume every village will have what you need. Check resupply points before you start and build some flexibility into your plan.
On the Cape Wrath Trail, food planning is not just convenience — it is part of your safety system.
When to Hike the Cape Wrath Trail
The best time to hike the Cape Wrath Trail is usually May to early June, when daylight is long, weather can be more settled, and midges are not yet at their worst.
Late June to August gives you long daylight hours, but midges can make camping and evening stops miserable.
A head net and insect repellent become essential during this period.
September can also be a good option for experienced hikers, with fewer people and autumn colours, but daylight is shorter and weather can become more changeable.
Winter attempts are a completely different undertaking and should only be considered by highly experienced hikers with winter mountain skills.
Getting to the Trail and Back
Getting to the start in Fort William is relatively simple. Trains and buses connect Fort William with Glasgow, Edinburgh, Inverness, and other parts of Scotland.
Getting back from Cape Wrath is more complicated.
The finish is remote, and onward travel usually depends on a combination of walking, the Cape Wrath ferry across the Kyle of Durness, local transport to Durness, and then buses south.
Weather, ferry cancellations, and local service changes can all affect your exit from the trail. Do not assume the final day will be simple just because the walking is nearly done.
More Hiking in Scotland
If the Cape Wrath Trail has you thinking more seriously about hiking in Scotland, these guides will help you explore more routes, regions, and long-distance walks across the country.
- Ultimate Guide to Hiking in Scotland
- Best Hikes in Scotland
- West Highland Way
Cape Wrath Trail Route Options and Variants
One of the biggest differences between the Cape Wrath Trail and more established long-distance walks is that there is no single official route.
Instead, the trail is best understood as a rough south-to-north journey through the northwest Highlands, linking Fort William with Cape Wrath by using a mixture of paths, tracks, glens, passes, bothies, villages, and wild camping spots.
This is part of what makes the route so rewarding, but it also means you need to make more decisions than you would on a waymarked trail.
There is no single Cape Wrath Trail — only the route you choose, adapt, and safely manage as the Highlands change around you.
The Glenfinnan Variant
The Glenfinnan Variant is one of the most popular and dramatic ways to begin the Cape Wrath Trail.
This route takes you west from Fort William toward Glenfinnan before pushing into the Rough Bounds of Knoydart, one of the wildest and most remote areas in Britain.
It gives the trail a serious expedition feel almost immediately, with rough ground, bothies, river crossings, and long days through remote country.
For experienced hikers, this is one of the most rewarding starts. For less experienced backpackers, it can also be a sharp introduction to how demanding the Cape Wrath Trail can become.
Lower-Level and Bad-Weather Options
Because the Cape Wrath Trail is not a fixed route, many hikers adjust their line depending on weather, river levels, fatigue, and local conditions.
In good weather, higher or more dramatic variants may be tempting. In poor visibility, heavy rain, or strong winds, lower-level options can be the safer choice.
This is especially important on a trail where river crossings, boggy ground, and pathless sections can change dramatically after bad weather.
A route that looks manageable on a map may feel completely different after several days of rain.
Choosing Your Route
Your Cape Wrath Trail route should match your experience, navigation ability, fitness, and tolerance for uncertainty.
If you want the wildest version of the trail, choose a more remote line with bothies, wild camps, and mountain passes.
If you want a slightly more manageable experience, build your route around known resupply points, occasional accommodation, and lower-level alternatives when conditions are poor.
There is no perfect version of the Cape Wrath Trail.
The best route is the one that gets you safely from Fort William to Cape Wrath while giving you enough flexibility to respond to the Highlands as they actually are, not as they looked on paper.
Cape Wrath Trail Map, GPX and Navigation
A map and GPX file are not optional extras on the Cape Wrath Trail. They are central parts of the route.
Because the trail is unmarked and has no single official line, you need to study your route before you begin and carry reliable navigation tools throughout the hike.
Most hikers use a combination of waterproof maps, a guidebook, offline mapping apps, and GPX files. A phone or GPS device can be useful, especially in poor visibility, but it should not be your only navigation system.
Recommended Navigation Setup
At minimum, your navigation setup should include:
- Waterproof maps covering the full route
- A compass you know how to use
- A guidebook or route notes
- Offline maps downloaded to your phone
- GPX files for your chosen route and variants
- A power bank or spare battery system
This may sound excessive, but the Cape Wrath Trail is exactly the kind of route where backup systems matter.
Fog, heavy rain, low cloud, river detours, and fading battery life can all turn a simple navigation decision into a serious problem.
Using GPX Files Sensibly
GPX files are useful for keeping yourself on track, checking your location, and comparing route variants.
However, they should not be followed blindly. On the Cape Wrath Trail, local conditions matter. A river crossing may be unsafe, a boggy section may take longer than expected, or poor weather may make a higher variant a bad idea.
Use GPX as a tool, not as permission to stop thinking.
Cape Wrath Trail: A 14-Day Itinerary
While there are countless variations of the Cape Wrath Trail that you can choose to follow, the most popular and dramatic choice is the Glenfinnan Variant.
This fourteen-day route is made up of approximately 16 miles per day, which requires a solid level of fitness to begin with.
The Cicerone guidebook lays out 14 official stages, each of which can be modified to match your desired pace.
This serves as a guideline, not a “must-follow”, because remember, you can wild camp anywhere and never need to have a clear destination in mind.
| Day | Route | Distance | Elev. Gain | Elev. Loss | Est. Time |
| Day 1 | Fort William to Glenfinnan | 17 miles (27 km) | 3,200 ft (975 m) | 2,600 ft (790 m) | 7–9 hours |
| Day 2 | Glenfinnan to A’Chuil Bothy | 13 miles (21 km) | 3,500 ft (1,067 m) | 3,100 ft (945 m) | 6–8 hours |
| Day 3 | A’Chuil to Barisdale | 14 miles (22 km) | 4,200 ft (1,280 m) | 4,000 ft (1,220 m) | 7–9 hours |
| Day 4 | Barisdale to Morvich (via Kinloch Hourn) | 18 miles (29 km) | 3,800 ft (1,160 m) | 4,100 ft (1,250 m) | 8–10 hours |
| Day 5 | Morvich to Strathcarron | 17 miles (27 km) | 3,600 ft (1,097 m) | 3,700 ft (1,128 m) | 7–9 hours |
| Day 6 | Strathcarron to Kinlochewe | 19 miles (31 km) | 3,900 ft (1,189 m) | 3,800 ft (1,158 m) | 8–10 hours |
| Day 7 | Kinlochewe to Dundonnell (via Beinn Eighe) | 16 miles (26 km) | 4,600 ft (1,402 m) | 4,500 ft (1,372 m) | 8–11 hours |
| Day 8 | Dundonnell to Ullapool | 20 miles (32 km) | 3,200 ft (975 m) | 3,300 ft (1,006 m) | 8–10 hours |
| Day 9 | Ullapool to Inchnadamph | 17 miles (27 km) | 3,100 ft (945 m) | 3,000 ft (914 m) | 7–9 hours |
| Day 10 | Inchnadamph to Kylesku | 15 miles (24 km) | 2,800 ft (853 m) | 2,900 ft (884 m) | 6–8 hours |
| Day 11 | Kylesku to Rhiconich | 16 miles (26 km) | 3,400 ft (1,036 m) | 3,300 ft (1,006 m) | 7–9 hours |
| Day 12 | Rhiconich to Kinlochbervie / Blairmore | 10 miles (16 km) | 1,800 ft (549 m) | 1,900 ft (579 m) | 4–5 hours |
| Day 13 | Blairmore to Strathan Bothy (via Sandwood Bay) | 14 miles (22 km) | 1,600 ft (488 m) | 1,600 ft (488 m) | 5–7 hours |
| Day 14 | Strathan to Cape Wrath Lighthouse | 11 miles (18 km) | 1,200 ft (366 m) | 1,400 ft (427 m) | 4–6 hours |
Day 1: Fort William to Glenfinnan
Distance: 17 miles (27 km)
Elevation Gain: 3,200 ft (975 m)
Elevation Loss: 2,600 ft (790 m)
Average Time to Hike: 7–9 hours
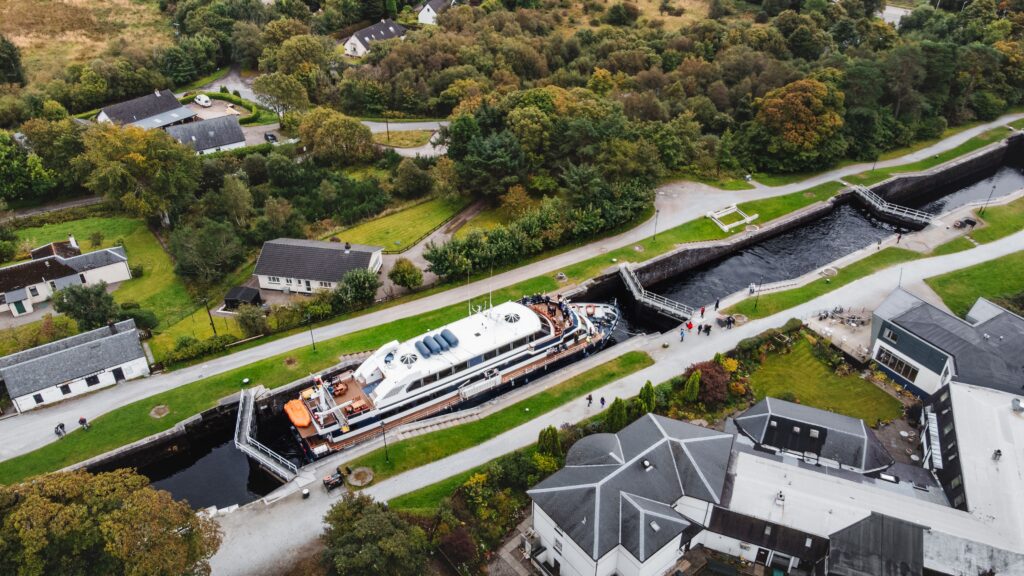
Fort William, the “Outdoor Capital of the UK”, marks the start of the Cape Wrath Trail.
As soon as you step off the ferry across Loch Linnhe to Camusnagaul, the trail meets you with its classic character.
There are no trail signs, waymarks, and simply nothing to point you in the right direction, so the map use starts right off the bat.
The Glennfinnan Variant heads south immediately before looping north to head through the Cona Glen.
Here, you climb to a high bealach before descending into the Glenfinnan Viaduct.
Here’s where you’ll find the first taste of pathless and boggy terrain on top of getting your body accustomed to carrying a heavy pack.
The trail doesn’t accommodate, it pushes you from the very beginning, so the day may feel harder than expected based on the numbers.
Day 2: Glenfinnan to A’Chuil Bothy
Distance: 13 miles (21 km)
Elevation Gain: 3,500 ft (1,067 m)
Elevation Loss: 3,100 ft (945 m)
Average Time to Hike: 6–8 hours
Your second day on the trail pushes deeper into the wild terrain of Scotland. Heading south of Glenfinnan, you start to edge into the fringes of Rough Bounds country.
This region is defined by steep and chaotic terrain where you’re unlikely to find many paths. Right away, you’re in one of the most remote sections of the trail.
The hard push is rewarded with Corryhully Bothy, one of the nicest shelters you can find along the way.
The other option is to head a bit further to the A’Chuil Bothy, found deep in Glen Dessarry.
Navigation becomes more of a challenge here, so having your map and compass handy at all times so you don’t get too far off trail is a good idea.
Day 3: A’Chuil to Barisdale
Distance: 14 miles (22 km)
Elevation Gain: 4,200 ft (1,280 m)
Elevation Loss: 4,000 ft (1,220 m)
Average Time to Hike: 7–9 hours
The third day holds one of the most spectacular stretches of the entire route.
The crossing to Barisdale brings you into Knoydart, often called the ‘Last Great Wilderness” in all of Britain.
This peninsula is only accessible by sea or by foot. The terrain here is dramatically steep with massive descents to get to Loch Hourn, across which you are given stunning views across the pewter waters.
This section has a large number of bothies, so you won’t need a tent if you don’t want to. That being said, camping beside the loch is unbeatable.
Day 4: Barisdale to Morvich (via Kinloch Hourn)
Distance: 18 miles (29 km)
Elevation Gain: 3,800 ft (1,160 m)
Elevation Loss: 4,100 ft (1,250 m)
Average Time to Hike: 8–10 hours
After Barisdale, you need to climb over the Forcan Ridge.
This can be an exhilarating scramble in clear conditions and a difficult one in lesser weather. After the big climb up, you descend to the valley at Morvich near Shiel Bridge.
This is definitively the hardest and most demanding day on the southern half of the trail.
Fortunately, Shiel Bridge and Kintail Lodge Hotel both offer the last reliable resupply and hot food until you get to Strathcarron.
Day 5: Morvich to Strathcarron
Distance: 17 miles (27 km)
Elevation Gain: 3,600 ft (1,097 m)
Elevation Loss: 3,700 ft (1,128 m)
Average Time to Hike: 7–9 hours
Right out of Morvich, the trail climbs up and past the Falls of Glomach, the highest natural waterfall in the UK.
Topping out at around 400 feet tall, these falls are some of the most spectacular you’ll find on the trail.
Afterwards, you cross the remote moorland of Monar where the walking is pathless and demanding with river crossings that can be impassable after heavy rain.
Toward the end of the day, you will wind up in Strathcarron, a tiny community that marks the transition from the southern Highlands to the wilder, more vast north.
Day 6: Strathcarron to Kinlochewe
Distance: 19 miles (31 km)
Elevation Gain: 3,900 ft (1,189 m)
Elevation Loss: 3,800 ft (1,158 m)
Average Time to Hike: 8–10 hours
Old stalkers’ paths running through the fringes of Torridon make up the majority of the sixth day on the trail.
These ancient red sandstone mountains slowly begin to dominate the skyline, and the feeling that comes with them is prehistoric.
Kinlochewe is a small village, but they have a shop and a pub where you can do a small resupply and dry out before you head on to the notorious Beinn Eighe section.
Day 7: Kinlochewe to Dundonnell (via Beinn Eighe)
Distance: 16 miles (26 km)
Elevation Gain: 4,600 ft (1,402 m)
Elevation Loss: 4,500 ft (1,372 m)
Average Time to Hike: 8–11 hours
Most thru-hikers will call this section the most demanding day on the entire Cape Wrath Trail.
Crossing Beinn Eighe requires a long traverse over trackless, rocky, and boggy ground above a high-altitude lochan. Beyond the loch, the section is rough and steep.
All of the experienced hikers will warn you about it, but will also mention the extraordinary views. Arriving in Dundonnell at the end of the day is a huge achievement that you can feel proud of.
Day 8: Dundonnell to Ullapool
Distance: 20 miles (32 km)
Elevation Gain: 3,200 ft (975 m)
Elevation Loss: 3,300 ft (1,006 m)
Average Time to Hike: 8–10 hours
As one of the most celebrated mountain ridges in Scotland, the An Teallach massif is a monumental sight along the Cape Wrath Trail.
The trail crosses here before descending to the coast at Little Loch Broom.
From there, you follow a mix of tracks and paths to Ullapool, the largest village on the trail. The harbour, restaurants, and accommodation offer up the opportunity for some serious rest if needed.
Day 9: Ullapool to Inchnadamph
Distance: 17 miles (27 km)
Elevation Gain: 3,100 ft (945 m)
Elevation Loss: 3,000 ft (914 m)
Average Time to Hike: 7–9 hours
After a full resupply, the trail heads north from Ullapool and enters Assynt.
This is a landscape filled with quartzite mountains, the jet out of flat moorland studded with lochs. The eeriness of the terrain can feel alien, but the walking is much quieter and more meditative here.
You can find a hostel and hotel at the end of the day in Inchnadamph if looking for a warm bed to stay in and people to talk with after a more isolated day.
Day 10: Inchnadamph to Kylesku
Distance: 15 miles (24 km)
Elevation Gain: 2,800 ft (853 m)
Elevation Loss: 2,900 ft (884 m)
Average Time to Hike: 6–8 hours
This day is a bit shorter than others, but is still full of scenery to write home about
The trail passes beneath Glencoul and Glendhu bothies, both perched above their own sea lochs.
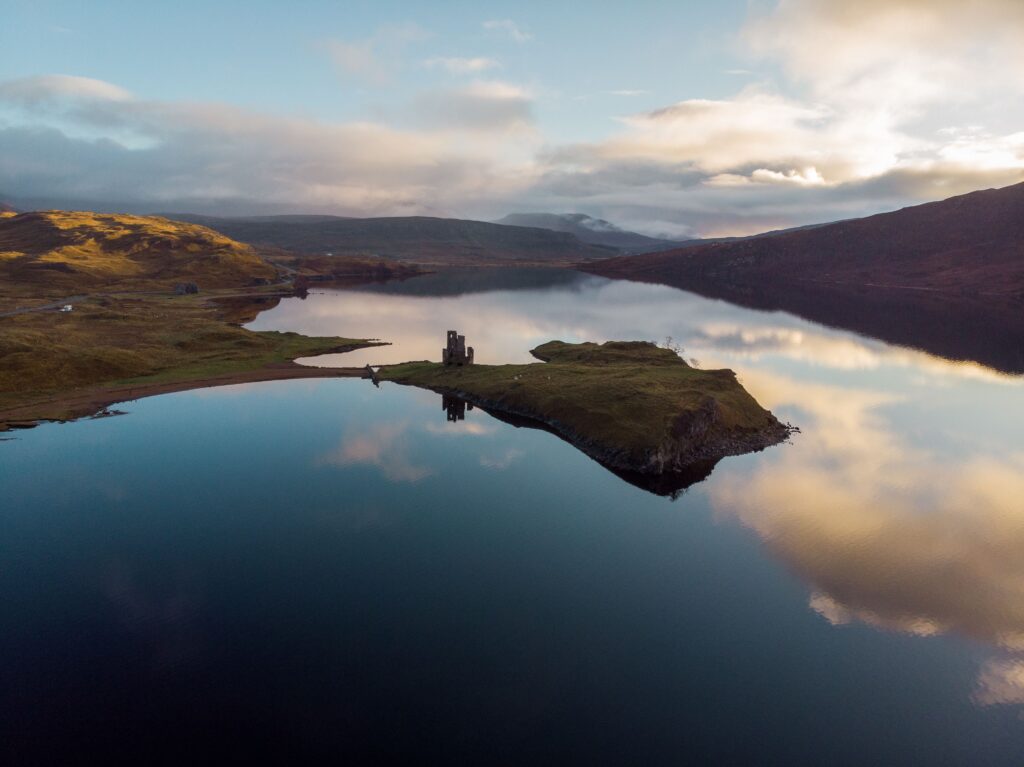
The area surrounding Kylesku is intensely dramatic coastal scenery that provides some contrast to the mountains you have spent the last week walking.
The Kylesku Hotel is a popular spot to stop for thru-hikers so you can grab fresh seafood and cold drinks while enjoying views over the loch.
Day 11: Kylesku to Rhiconich
Distance: 16 miles (26 km)
Elevation Gain: 3,400 ft (1,036 m)
Elevation Loss: 3,300 ft (1,006 m)
Average Time to Hike: 7–9 hours
Today is the second to last opportunity for a resupply, so it’s worth stocking up in case supplies are short down the trail.
After filling your bag, you head north through remote country between Assynt and the northwest coast.
You pass through the peaks of Arkle and Foinaven along high and open trackless terrain. Once you arrive in Rhiconich, you can stay in a hotel and resupply at a small shop.
Day 12: Rhiconich to Kinlochbervie / Blairmore
Distance: 10 miles (16 km)
Elevation Gain: 1,800 ft (549 m)
Elevation Loss: 1,900 ft (579 m)
Average Time to Hike: 4–5 hours
If you need a final resupply, today will be the time to do it with a stop at Kinlochbervie.
This is home to the last proper shop on the trail. After getting your final supplies, you will continue on to Blairmore.
Here is the starting point for the final wilderness section. This is an important time to take inventory of your supplies, dry your gear, and prepare for the final push.
The last two days on the trail are trackless and remote, making them demanding after having already hiked a long way.
Day 13: Blairmore to Strathan Bothy (via Sandwood Bay)
Distance: 14 miles (22 km)
Elevation Gain: 1,600 ft (488 m)
Elevation Loss: 1,600 ft (488 m)
Average Time to Hike: 5–7 hours
Your second to last day on the trail crosses wild moorland to Sandwood Bay.
This impossibly beautiful stretch of white sand has a backdrop of dunes and sea stacks, making it utterly gorgeous land.
You won’t find roads or buildings here, and you’re likely to encounter very few people along the way.
A lot of hikers talk about this day as their favorite for the isolation and reflection on the journey before entering their final day.
Strathan Bothy lies at the end of a rough path north from the bay where you can stay the night.
It’s a small and compact shelter with atmospheric views, but does the job for a final night out.
Day 14: Strathan to Cape Wrath Lighthouse
Distance: 11 miles (18 km)
Elevation Gain: 1,200 ft (366 m)
Elevation Loss: 1,400 ft (427 m)
Average Time to Hike: 4–6 hours
The final day on the Cape Wrath Trail is a slog across trackless bog and moorland to arrive at the windswept cape.
The lighthouse here sits at the furthest northwest point in all of mainland Britain atop cliffs that tower over the Atlantic.
There’s a seasonal cafe here that’s overpriced, but well worth it after a final day on the trail.
A military road leads away from the lighthouse to the Kyle of Durness ferry, where you can connect to the village of Durness and find public transport.
It’s important to double check ferry times, otherwise you may find yourself staying out for another night.
Resupply, Bothies and Wild Camping
The Cape Wrath Trail is not a route where you can rely on regular villages, daily shops, or guaranteed accommodation.
For most hikers, the trail is built around a mix of wild camping, bothies, occasional paid accommodation, and careful resupply planning.
This is one of the biggest differences between the Cape Wrath Trail and more established long-distance walks in the UK.
You need to think about where you will sleep, how much food you need to carry, and what your backup options are if the weather, rivers, or terrain slow you down.
Wild Camping on the Cape Wrath Trail
Most Cape Wrath Trail thru-hikers carry a tent and wild camp for much of the route.
This gives you the flexibility to stop when conditions make sense rather than forcing yourself to reach a fixed village or accommodation point.
That flexibility is essential on a trail where progress can be slowed by bog, river crossings, poor visibility, or long pathless sections.
The challenge is that good camping spots are not always easy to find.
Much of the ground is wet, uneven, exposed, or covered in heather. It is worth starting to look for a suitable place before you are completely exhausted, especially in bad weather.
Wild camping also means carrying more weight. Your shelter, sleeping system, stove, food, and waterproof gear all need to be reliable enough for remote Scottish conditions.
Wild camping gives you freedom on the Cape Wrath Trail, but only if your shelter, judgement, and timing are up to the conditions.
Using Bothies Along the Route
Bothies are one of the most memorable parts of hiking in the Scottish Highlands, and several can be useful along the Cape Wrath Trail.
A bothy is a basic mountain shelter, usually free to use and maintained for walkers and outdoor users.
Some are simple stone buildings with little more than walls and a roof, while others may have sleeping platforms, fireplaces, or more space to spread out.
Bothies should never be treated as guaranteed accommodation.
They may be full, closed, hard to find in poor weather, or unsuitable in the conditions you arrive in. You should always carry a tent, even if your plan includes sleeping in bothies.
The best way to think of bothies is as useful bonus shelter, not as the foundation of your entire accommodation plan.
Paid Accommodation and Rest Stops
Although the Cape Wrath Trail feels remote for much of its length, there are still places where you can find paid accommodation, hot food, showers, and resupply.
Common stops include areas around Shiel Bridge, Strathcarron, Kinlochewe, Dundonnell, Ullapool, Inchnadamph, Kylesku, Kinlochbervie, and Durness.
These places can be extremely valuable for drying gear, charging electronics, eating a proper meal, and recovering mentally before the next remote stretch.
In summer, accommodation can book out quickly, especially in smaller villages with limited rooms.
If you want to use hotels, hostels, or guesthouses, plan ahead and avoid assuming there will always be a bed available.
A bed, a hot meal, and a place to dry your gear can feel like luxury after days of bog, rain, and rough ground.
Resupply Planning
Resupply is one of the most important planning jobs on the Cape Wrath Trail.
There are long sections where shops are limited or non-existent, and opening hours can be unpredictable in remote areas.
Some villages may have only a small shop, while others may offer food but not the full range of supplies a thru-hiker needs.
Most hikers will need to carry several days of food at different points along the route.
Lightweight, high-calorie food is essential because you will already be carrying camping gear, waterproof layers, navigation tools, and safety equipment.
Before starting, map out your likely resupply points and know which sections require extra food.
It is also worth carrying one emergency meal in case a shop is closed, a ferry is cancelled, or a day takes longer than expected.
Flexibility Matters More Than Precision
On the Cape Wrath Trail, your plan is only a starting point.
Bad weather, high rivers, fatigue, ferry cancellations, full bothies, or slow terrain can all force changes.
A good plan gives you structure, but a safe plan gives you room to adapt.
Build in spare time where possible, avoid relying on perfect daily mileage, and do not make your accommodation or transport schedule so tight that you feel pressured into unsafe decisions.
The Cape Wrath Trail rewards preparation, but it also rewards humility. Out here, the Highlands have the final say.
Planning, Preparation & Training
The Cape Wrath Trail rewards more than enthusiasm. These guides will help you prepare your body, gear, mindset, and planning system before taking on a remote route like this.
Planning and Preparation
Use this section for route planning, packing systems, navigation, safety, accommodation logistics, and the practical details that make a long-distance hike more manageable.Fitness and Training
A good place to build the strength, stamina, balance, and load-carrying fitness needed for long days across rough, boggy, uneven terrain.Mindset and Motivation
Useful for the mental side of long-distance hiking, especially when the weather turns, progress slows, or the trail feels harder than expected.
What to Pack to Hike the Cape Wrath Trail
Packing for the Cape Wrath Trail is one of the biggest planning decisions you’ll make.
This is not a route where you can rely on regular towns, daily accommodation, or easy exits if your gear fails.
You need a setup that can handle wild camping, heavy rain, boggy ground, river crossings, cold nights, midges, and long days through remote terrain.
At the same time, your pack needs to stay light enough to carry comfortably for two to three weeks.
The goal is simple: carry enough to stay safe and self-sufficient, but not so much that your pack becomes the hardest part of the trail.
🗒️ Free Checklist: “Pack light, pack right — download The Ultimate Hiking Packing List.”
Backpack
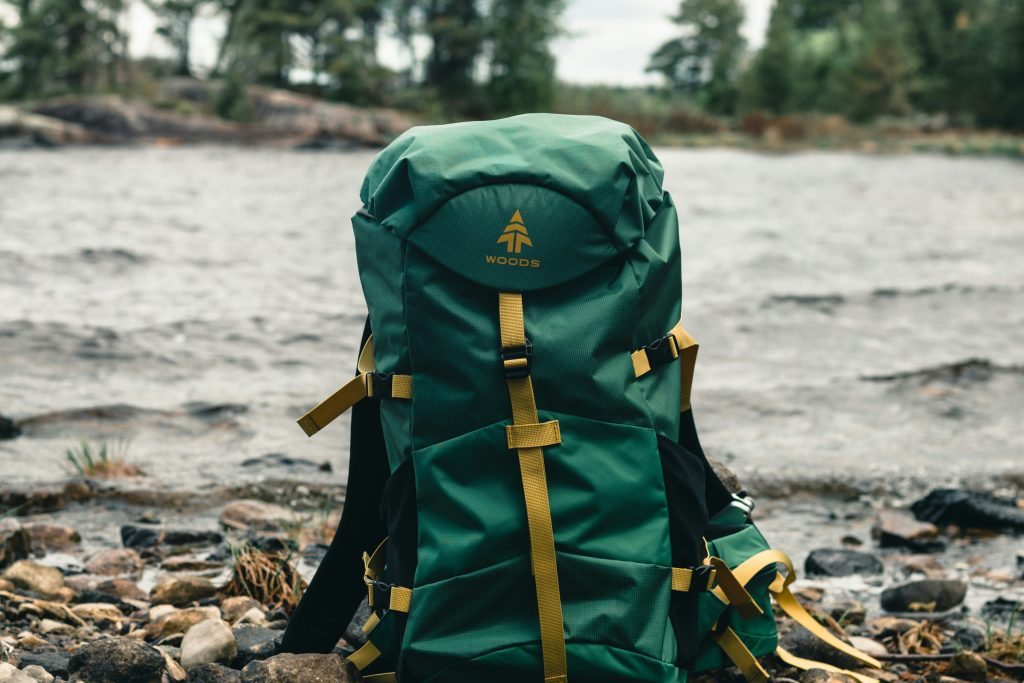
Most Cape Wrath Trail hikers will need a backpack in the 50–65 litre range.
Because wild camping is the standard approach, your pack needs to carry a shelter, sleeping system, stove, food, waterproof layers, spare clothing, navigation tools, and safety equipment.
At certain points, you may also need to carry several days of food.
Pack weight matters more here than on easier long-distance walks.
Boggy ground, steep descents, river crossings, and pathless moorland all feel harder with a heavy pack.
Keep your gear simple, avoid unnecessary extras, and make sure the pack fits properly before you start.
Shelter and Sleep System
A reliable tent or lightweight shelter is essential for most hikers. Bothies can be useful, but they should not be treated as guaranteed accommodation.
Your shelter needs to handle wind, rain, wet ground, and exposed camping spots.
A warm sleeping bag, insulated sleeping mat, and dry sleep clothes are also important, even in summer.
The Highlands can feel cold at night, especially after a wet day.
Pack your sleeping gear in a dry bag or waterproof liner.
On the Cape Wrath Trail, keeping your sleep system dry is one of the most important parts of staying comfortable and safe.
Footwear
Footwear is a major decision on the Cape Wrath Trail.
Some experienced hikers use trail runners, but many prefer waterproof hiking boots because of the boggy ground, rough descents, wet heather, and uneven terrain.
Whatever you choose, your footwear needs strong grip, good comfort over long distances, and enough protection for rough ground.
Expect wet feet at some point. The goal is not to stay perfectly dry every day, but to manage moisture, avoid blisters, and keep your feet healthy enough to continue.
Gaiters can be useful for keeping mud, heather, and debris out of your footwear, especially during boggy or pathless sections.
Socks and Foot Care
Foot care can make or break your Cape Wrath Trail attempt.
Carry multiple pairs of good hiking socks so you can rotate them, dry them when possible, and keep one pair protected for sleeping if conditions are wet.
Merino or synthetic socks are best because they handle moisture better than cotton.
Blister care is essential. Pack blister plasters, tape, and any foot-care items you already know work for you. Do not test a new footwear system for the first time on this trail.
On a trail this wet and rough, looking after your feet is not a comfort detail — it is what keeps you moving.
Clothing Layers
A proper layering system is essential for Scotland’s changing weather.
Start with a moisture-wicking base layer, add a fleece or insulated mid-layer, and finish with a waterproof outer shell. You’ll also want quick-drying hiking trousers, warm sleep clothes, spare socks, gloves, and a warm hat.
Even in summer, wind and rain can make the Highlands feel cold. Avoid cotton and choose clothing that dries quickly, keeps you warm when damp, and can handle repeated wet days.
Waterproof Gear
A high-quality waterproof jacket and waterproof trousers are non-negotiable on the Cape Wrath Trail.
The northwest Highlands are wet, exposed, and unpredictable. You may hike through hours of rain, wet vegetation, bog, and wind-driven showers.
Your waterproofs need to be reliable, comfortable enough to walk in, and easy to access quickly.
Use dry bags or a waterproof pack liner to protect your sleeping gear, warm layers, electronics, documents, and spare clothes. Assume your pack will get wet at some point and organise your gear accordingly.
Navigation Tools
Navigation is one of the most important parts of your kit.
Carry waterproof maps, a compass, a guidebook or route notes, and offline maps with GPX files downloaded before you start.
A phone or GPS device is useful, but it should not be your only navigation system.
You need to be able to navigate in poor visibility, heavy rain, low cloud, and trackless terrain.
Batteries can fail, screens can break, and weather can make simple decisions harder, so build redundancy into your navigation setup.

Food and Cooking Gear
Because resupply points are limited, you’ll need to carry lightweight, high-calorie food.
Common options include oats, nuts, dried fruit, energy bars, dehydrated meals, instant rice, noodles, chocolate, nut butter, and other calorie-dense foods that are easy to prepare.
A stove is strongly recommended. Hot food and warm drinks can make a big difference after cold, wet days. Keep your cooking setup simple, reliable, and light.
Always know where your next resupply point is, and consider carrying an emergency meal in case a shop is closed, weather delays you, or a day takes longer than expected.
Be sure to check out our Diet and Nutrition Section to help you plan your food plan out
Water Treatment
There is plenty of water in the Highlands, but you should still carry a reliable way to treat it.
A lightweight filter, purification tablets, or drops can help reduce the risk of drinking unsafe water, especially near farmland, livestock, bothies, or slow-moving sources.
You do not need to carry huge amounts of water all day in most conditions, but you should always check the next reliable source before moving into a more remote or exposed section.
First Aid and Emergency Gear
Your first aid kit should be small but practical.
Include blister care, pain relief, antiseptic wipes, dressings, bandages, personal medication, tick removal tools, and anything specific to your own health needs.
This is a remote trail, so minor problems can become bigger issues if ignored.
Many hikers also carry an emergency bivvy, whistle, headlamp, spare batteries or power bank, and a satellite messenger or emergency communication device.
These are especially worth considering if you are hiking solo.

Electronics
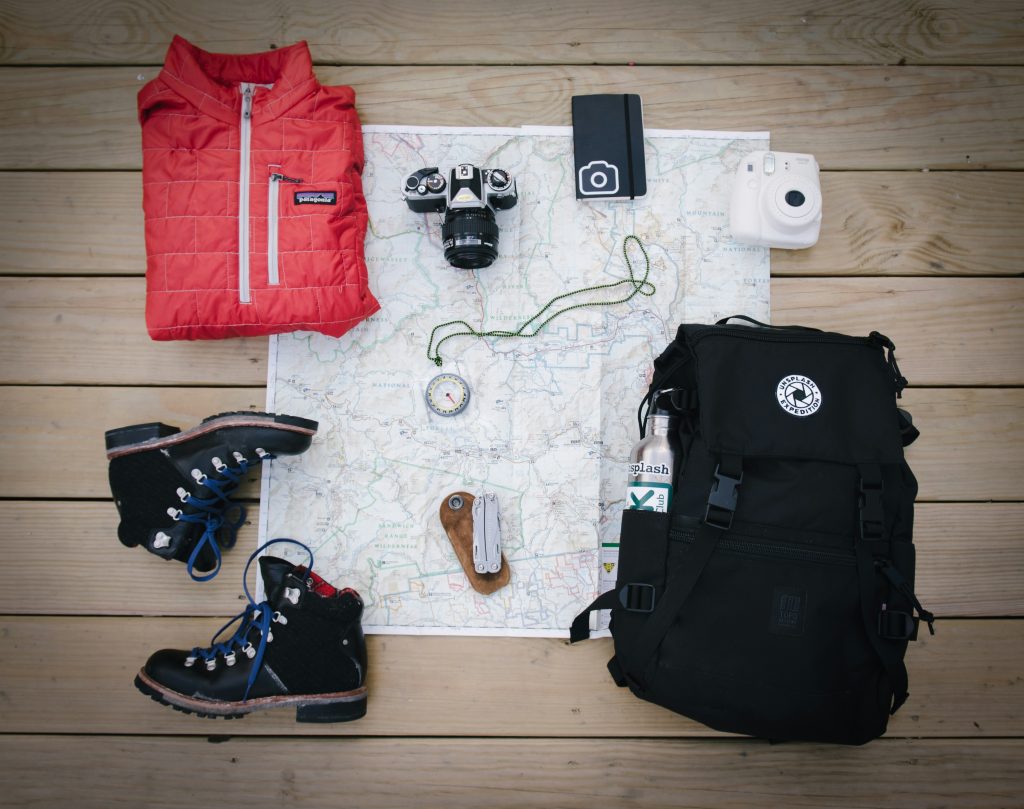
A smartphone with offline maps can be extremely useful, but it needs to be protected and kept charged.
Carry a power bank, charging cables, and waterproof storage for your electronics.
A headlamp is also worth packing even during long summer days, especially if delays force you to arrive at camp later than expected.
If you rely on your phone for navigation, treat battery management as part of your safety system, not just a convenience.
Midge Protection
If you hike from late June through August, midges can become one of the most miserable parts of the Cape Wrath Trail.
A midge head net is highly recommended, along with insect repellent and clothing that covers your arms and legs in camp.
Midges are usually worst in still, damp conditions, especially around dawn, dusk, and sheltered camping spots.
They may be tiny, but they can seriously affect your comfort, sleep, and patience on the trail.
Useful Extras
Trekking poles are extremely useful on the Cape Wrath Trail. They help with balance on river crossings, steep descents, boggy ground, and rough pathless sections.
Other useful extras include a repair kit, lighter or matches, spare dry bags, sunscreen, lip balm, toilet kit, lightweight towel, and a small amount of cash for remote stops.
Keep extras controlled. Every item should earn its place in your pack.

FAQ
How difficult is the Cape Wrath Trail?
The Cape Wrath Trail is consistently listed as the most challenging long-distance trek in all of Britain. That’s a reputation that’s earned by long days through remote and trackless terrain with the potential for seriously challenging weather the entire time.
Can beginners hike the Cape Wrath Trail?
In general, it’s recommended that you have some experience before hiking the Cape Wrath Trail. This isn’t a route for beginners that are unfamiliar with remote and rugged mountain areas.
Is wild camping allowed on the Cape Wrath Trail?
Thanks to Scotland’s Land Reform Act in 2003, everyone has the right of responsible access to land for camping and walking. So yes, wild camping is both allowed and encouraged along the way.
What gear is essential for the Cape Wrath Trail?
Non-negotiable gear includes a solid waterproofing system, map and compass, and waterproof hiking boots. This is on top of the normal gear required for all thru-hikes where you are camping along the way. Many will say that a midge head net is also essential after experiencing the storm of them that comes after June.
How long does it take to hike the Cape Wrath Trail?
While the fastest known time for the Cape Wrath Trail is 3 days, 13 hours, and 39 minutes, most people take around 14 days to complete the trail. Many will take longer to explore the region and simply take their time.
What is the best part of the Cape Wrath Trail?
Every Cape Wrath Trail hiker has their own idea of what the best part of the trail is. Many people love Knoydart, the Falls of Glomach, the Beinn Eighe traverse, Sandwood Bay, and more. Many others simply love the challenge and the rhythm of walking found only in the wilderness.
Summary
Thru-hiking the Cape Wrath Trail isn’t for everyone. This fact is part of what makes it so extraordinary.
Most long-distance trails in Europe are mapped out, accommodated with a plethora of hotels and guesthouses, but the Cape Wrath Trail is different.
This is a trail that takes you across rugged, truly wild terrain, while making you earn every step that you put forward.
The uniqueness of every person’s journey on the trail, the stunning views, the overcoming of challenges, and the feeling of accomplishment at the end are unparalleled to any other thru-hike out there.
Where to Next?
If this guide has helped you understand what makes the Cape Wrath Trail so demanding, these nearby routes and wider European treks will help you choose your next long-distance hiking challenge.
Nearby Hiking Inspiration
West Highland Way
A more accessible Scottish long-distance walk and a good stepping stone before taking on the rougher, wilder Cape Wrath Trail.
Dingle Way
A scenic Irish long-distance route with coastal walking, village stays, and a much gentler introduction to multi-day hiking.
Cotswold Way
A classic English National Trail with rolling countryside, historic villages, and easier logistics than remote wilderness routes.
Wider European Inspiration
GR20
A tougher and more technical mountain route through Corsica, ideal if you want another serious European trek with a big reputation.
Peaks of the Balkans
A remote cross-border trail through Albania, Kosovo, and Montenegro for hikers who want wild mountain landscapes and a stronger expedition feel.
Kungsleden
A long-distance route through Swedish Lapland, offering big wilderness scenery, remote walking, and a very different northern European adventure.