Overview of the Laugavegur Trail
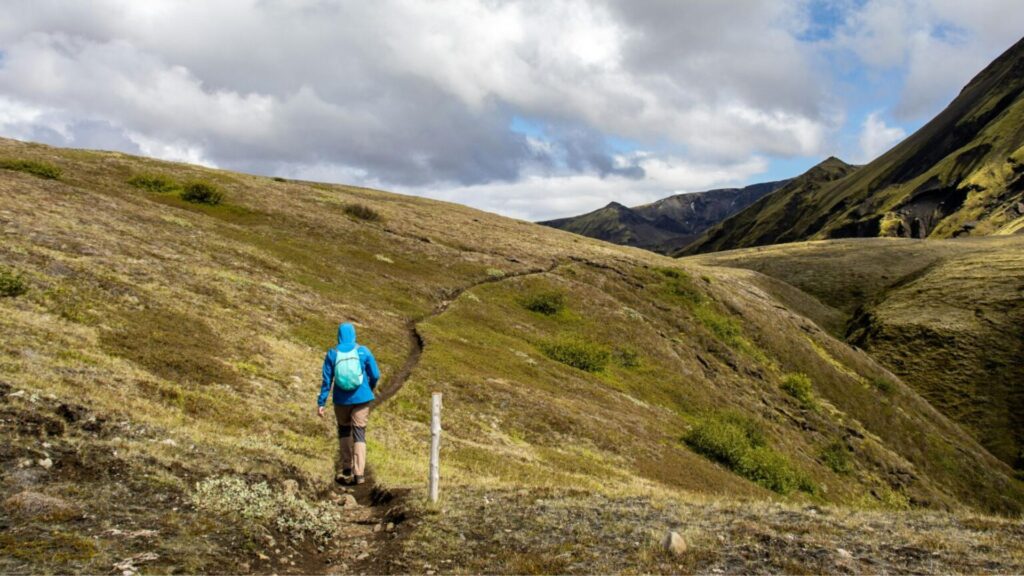
The Laugavegur Trail (“Laugavegurinn” in the local language) has earned its spot as Iceland’s most famous long-distance hiking route. The 55-kilometer path takes you through wildly varied landscapes in the southern Icelandic Highlands. Running from Landmannalaugar to Þórsmörk, you’ll encounter geothermal hot springs, rhyolite mountains blasting with color, dark black lava fields, rushing rivers, deserts made from obsidian, glacier-formed and fed valleys, and brilliant birch forests.
This route has been popularly trekked since its official establishment in 1978. Ever since National Geographic labeled it as one of the top 20 trails in the entire world, people have come to see what it’s all about. There are around 75,000-100,000 hikers who embark on this journey each season. This article is here to get you strapped up and ready to join the hikers of the world and explore what Iceland has to offer!
The Need to Know for the Laugavegur Trail
Overall Difficulty
The Laugaveur is typically rated as a moderate or challenging route, even though it’s quite short and not intensely demanding, physically speaking. The thing is, this route includes some seriously steep ascents and descents that will challenge you from the very start, some river crossings will demand that you strip your shoes off and plunge your feet into icy cold meltwater to cross, and you can easily find yourself hiking up to 7 hours each day.
With all that in mind, it’s necessary to be fit enough to carry a loaded backpack over rough terrain for multiple days in a row. Basic backpacking experience is strongly recommended, even if you have taken on a series of tough day hikes. An overnight trip can change things, and this is a trail you want to be ready for.
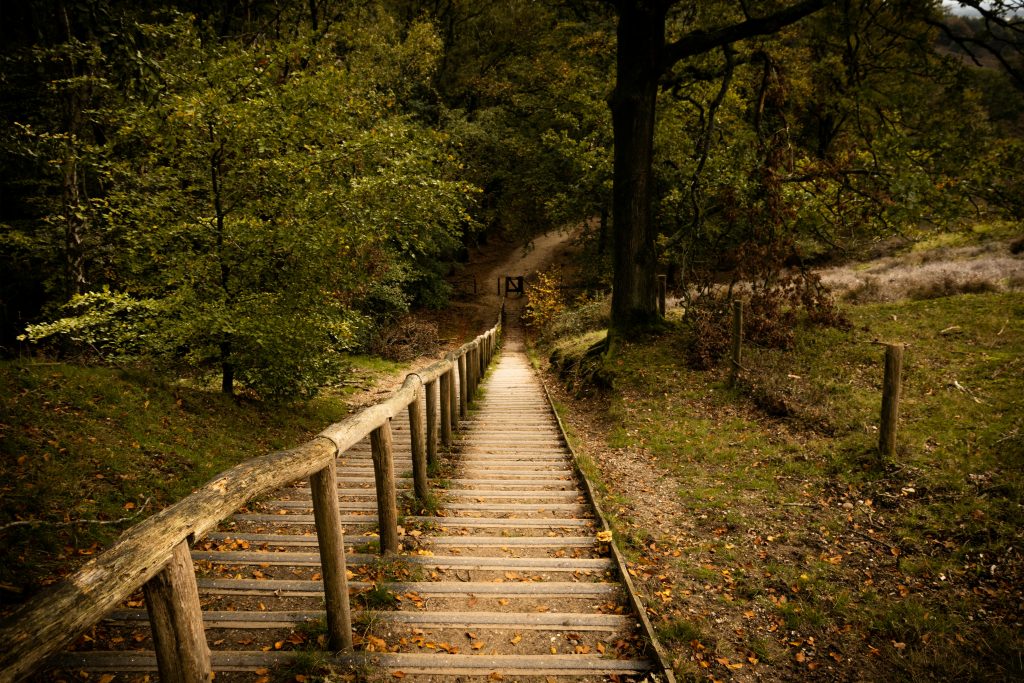
“First time on the trail? Hiking for Beginners has your back.”
Navigation
Navigation on the Laugavegur can be a breeze. The trail is well-marked with blue trail markers and yellow snow poles, making it straightforward and easy to follow. However, when tricky weather like dense fog, snow, or even whiteout conditions approaches, things can get difficult. With limited visibility, especially in higher sections like Hrafntinnusker, you need to be confident in your ability to navigate or hunker down.
Carrying both a GPS device and hardcopy maps is a good idea to have a backup when one may fail. This can help you find your way, even when it’s hard to see right in front of you.

Weather
Even in the summer, the weather in all of Iceland is famously unpredictable. Situated right in the middle of the ocean, the entire country is influenced by so many different factors that it’s always hard to know what’s coming. Rain, wind, fog, and even snow can come along with rapid temperature swings at any time of the year.
Typically, the summer will bring average temperatures between 5-15°C, with nighttime temps dropping below freezing, even in the middle of summer.
On top of the cold, strong winds with heavy rain is quite normal, especially along the exposed ridges and high points that you’re bound to cross while hiking the Laugavegur. With these conditions, hypothermia is a risk that can’t be taken lightly. Even in temperatures above freezing, your body needs to be protected with proper waterproof and insulating layers.
Itinerary for the Laugavegur Trail
The relatively short distance of the Laugavegur Trail means that most hikers can take anywhere between two days (pushing hard) to six days (taking their time) out on the trail. Most will hike for around four days, which is just enough to take it easy, enjoy the changing landscapes, but also move for most of the day.
The option to do an extension at Fimmvörðuháls can add an additional 1-2 days of hiking and can be incredibly worth the extra time and effort if you have the space in your schedule. We’ll cover this in more detail later on!
The itinerary we’re offering here gives hikers the chance to move at a steady pace without feeling rushed, yet not feel like they’re simply slogging along for a few hours a day without making progress. It can easily be adjusted and modified to fit whatever it is that you’re looking to get out of the time on the trail.
Day One: Landmannalaugar to Hrafntinnusker
Distance: 12 kilometers
Average Time: 5-7 hours
Deep in Iceland’s Fjallabak Nature Reserve, you’ll find Landmannalaugar on the edge of the Laugahraun lava field, formed back in the year 1477. Well known for its natural hot springs and stunning landscape, there couldn’t be a better starting point for the Laugavegur Trail.
Here, your trek begins through rhyolite mountains streaked with reds, yellows, greens, and blues, putting a massive contrast between the mountains and the deep black of the nearby lava fields. Many hikers choose to take a soak in the hot springs before they get started, an easy thing to do as they are so close to the trailhead.
Post-soak, you’ll head up a steep climb that gains elevation steadily over the first several kilometers out of Landmannalaugar. The terrain is made up of volcanic gravel, lava rock, and hard-packed dirt. It’s crucial to be wary as you move, as the terrain can be uneven and difficult to cross, especially with the eye-grabbing landscape all around.
With elevation, the vegetation slowly thins out to be replaced by barren slopes with overlooking views of the surrounding valleys. This small section can give some of the most dramatic panoramas of the entire trail, and arguably, in all of Iceland. It’s not uncommon to find patches of snow amongst the steam vents, even during summer.
The weather here is incredibly unpredictable and can change in an instant. As this is one of the most exposed sections of the entire trail, hikers need to be ready for strong winds and low visibility, even when it seems like the sun is shining brightly and all is well.
The final approach to Hrafntinnusker takes you across a high volcanic plateau of obsidian with patches of lingering snow along the way. Early on in the season, many trail markers may be buried, so it’s crucial to have solid navigation skills for this traverse.
The Hrafntinnusker Hut marks both the highest point of the trail and the end of what’s often considered the hardest day, both physically and mentally, of the Laugavegur. There’s a serious sense of accomplishment that comes from a hard trek up to a beautiful spot, knowing that there’s even more to come.

Day Two: Hrafntinnusker to Álftavatn
Distance: 12 kilometers
Average Time: 4-6 hours
Moving from the barren black obsidian fields, the trail descends from the high alpine plateau to greener terrain. As you leave Hrafntinnusker, it’s common to encounter icy patches, snowfields, and wet ground, especially early on in the season. This can be slippery and difficult, especially if visibility is still limited, making trekking poles a major asset.
As you drop down, the world around you starts to soften. The harsh volcanic rock transitions to soft rolling hills covered in mossy slopes with a backdrop of glacial rivers cutting through massive valleys. The trail slowly brings you closer to sea level with a series of ups and downs rather than a single descent.
Inside the new environment, you find a plethora of streams and small rivers that provide both a beautiful new aspect of your hiking day and a challenge to get across. Often, there are stepping stones or shallow fords, but with varying water levels, you may need to cross slightly deeper water. Depending on the level of rainfall and snowmelt, you can usually get across quite easily, but it can be difficult to keep your feet dry, which is important since the water is quite cold.
Coming to Álftavatn, you’re met with a broad valley that’s dominated by a calm mountain lake. Álftavatn means “Swan Lake,” which describes it well, as the reflection of the smooth water gives you a second full view of the mountains around you. The campsite and hut are both along the shoreline, giving a great spot to rest in a calmer, less exposed area than the first night out on the trail.
This day is considered to be the most scenic and easily enjoyable day on the Laugavegur. It’s demanding, but it also gives a solid balance of sweeping and dramatic views with gentler terrain. It gives a lot of hikers the feeling of success needed to keep moving forward and finish the trail.
Day Three: Álftavatn to Emstrur (Botnar)
Distance: 15 kilometers
Average Time: 5-7 hours
A bit longer than the previous two days on the trail, day three crosses some of the most expansive landscapes on the trail over a more gradual climb than before. Soon after leaving Álftavatn is one of the larger river crossings of the Laugavegur. Depending on the time of year and the past conditions, this could mean wading through knee-deep water that has been flowing straight from a glacier. An early morning crossing most frequently means a lower water level, but no matter what you should be aware of proper river crossing technique.
Once you pass the rivers, the trail enters into a black volcanic desert that is out of this world. This desert, the Mælifellssandur, is often described as being deceptively challenging. There’s not much climbing involved, but the open terrain can easily and quickly create relentless winds. That, on top of the lack of landmarks to gauge your process, can make the day drag on. When the sun shines down, the black sand blasts heat, while on cloudy days, the landscape feels stark and unforgiving.
The trail meanders up and down small hills across the plain while occasionally skirting along canyons that have been carved by meltwater over millions of years. In clear weather, you can see the mountains and the glaciers that sit in and around them in the distance. While this section feels quite empty, it is a highlight of what the interior of Iceland truly is.
A dramatic gorge cut by the Markarfljót River appears as you near Emstrur. There’s a short side path that’s well worth taking to head out to a viewpoint and see one of the most striking vistas of the entire journey. The campsite here is sheltered and you get to relax while taking in views of the rolling hills and neighboring glaciers after a solid day of trekking.
The third day of the Laugavegur takes a lot of endurance, both mentally and physically. Long and open stretches can test your hiking more than you may imagine at first, but the solitude that can be found here will be remembered as a highlight.

Day Four: Emstrur to Þórsmörk (Langidalur, Básar, or Húsadalur)
Distance: 15 kilometers
Average Time: 5-7 hours
The final day of the Laugavegur brings you yet again a demonstration of the diverse landscape of Iceland. The volcanic desert transforms into the lush green valley of Þórsmörk (pronounced Thor-smirk) as you make your way toward the endpoint of Laugavegur. After leaving Emstrur, the trail crosses rolling hills before descending slowly to the river systems that have created the valleys and entire landscapes you’ve been travelling through. The glaciers Mýrdalsjökull and Eyjafjallajökull stand out as dominating prominent features of the skyline amongst countless other mountains and glaciers.
This section, as it heads through the river system, naturally comes with several river crossings. Some of these are bridged, while others require tapping into your skills of wading across cold water. Here, you may find that the rivers are deeper and more powerful than the crossings you’ve already encountered, especially if you are hiking after heavy rains. It’s worth taking the time to assess the crossings and determine if they are absolutely essential because these rivers can be dynamic and highly unpredictable.
As elevation drops, the mossy ground is slowly replaced with dwarf birch forests and wildflowers speckled across grassy slopes. In contrast to the trek through the highlands, the air will feel warmer and calmer without the whipping winds that you’ve become accustomed to. The trail follows ridgelines and small ravines, taking you across suspension bridges, and offers a variety of terrain over the 15 kilometers of hiking.
Þórsmörk marks an obvious end for the Laugavegur and the sense of approaching it is inevitable. The protected valley that’s cradled between glaciers and mountains gives a cozy feeling to the final stretches. You will end your journey in either Langidalur, Básar, or Húsadalur.
“Plan less, walk more.” Pick a route, set your pace, and let Europe unfold under your boots: grab your free Walking Holiday ebook today”
Langidalur
The classic finish is at Langidalur as it’s the most common and straightforward place to hop off the trail. It has easy access to buses to get back to Reykjavik or Skógar, along with well-maintained facilities. If you want a clean and simple finish, this is it. The biggest drawback is, as the most popular end point, it can get super busy in the high season, so be ready for some crowds.

Básar
Básar is deeper in Þórsmörk, meaning it’s much closer to glacial rivers and rugged terrain. You need to make more river crossings and potentially need to navigate further in order to reach this point. It can feel much more adventurous and will add some more scenic and dramatic backdrops to your hike. This point also serves as a great base to go on more day hikes up to Valahnúkur, or Tindfjöll viewpoints.
Húsadalur
Finally, ending your trip at Húsadalur (the Volcano Huts) gives you a sense of community and comfort at the end of a long journey. It has showers and a sauna to help you recover after a long trek or to simply take a day to relax before continuing forward on your travels.
No matter where you end, the day is going to be emotionally rewarding. After a serious trek through harsh environments with breathtaking views left right and center, there’s nothing to do but bask in the experience you’ve just had and hopefully share it with others.
What to Pack for the Laugavegur Trail
Getting your bag packed for hiking the Laugavegur Trail isn’t only about bringing the lightest gear possible, it’s more about understanding the environment that you’re about to walk into. The Highlands of Iceland are remote and unforgiving with potentially extreme conditions that can turn on a dime. When you’re out on the trail, help can be far away, and there are no resupply points along the way. This is a truly remote area that demands bringing the right gear, or suffering from a lack of it.
🗒️ Free Checklist: “Never forget the essentials — grab your free Ultimate Hiking Packing List.”
Footwear
What shoes to wear on the Laugavegur is one of the most important decisions that you’ll make ahead of time. The trail crosses such varied terrain with things like volcanic gravel, lava rock, snow patches, wet tundra, and multiple river crossings. This means that there isn’t the “perfect shoe” out there to do it all. You have to understand where you’ll make tradeoffs when deciding on shoes.
For some highly experienced backpackers, trail runners can be the right move. They’re light, comfortable, and dry quickly in the right conditions. However, they will let your feet get wet easily and can mean cold toes that can be both uncomfortable and dangerous. For that reason, sturdy and waterproof hiking boots are often the better choice for this trail.
Wet feet are essentially inevitable on the Laugavegur. There are so many river crossings, the ground is deeply saturated, and it will likely rain at least once during your trip. The drawback to waterproof boots is that they can be difficult to dry out once they get wet. If you can avoid wet feet, do it.
Pairing whatever shoe you choose with a pair of gaiters is a great idea on this trail. The volcanic grit, mud, and water can easily make their way into your shoes and gaiters stop that. Plus, the Laugavegur could have you walking through snowfields at any point, so gaiters will help provide extra warmth and protection from the snow.

Backpack
The standard for hiking the Laugavegur is a 50-70 liter backpack, depending on how you plan to sleep at night. If you are camping, you likely need a larger pack, but with the option of staying in the huts, you can get by with less gear. You need to ensure that you have enough space for food, layers, and safety gear in addition to whatever sleep system you are using at night.
Ensuring that you have a way to keep your backpack, or at least the things in it, dry is a necessity on this trail. Harsh rains can work water into your gear easily, so you need to have waterproof pack liners and/or dry bags that all of your gear lives in. A simple rain cover can be nice for light rain, but can’t be reliable on this trail.
Clothing
The most important part of your clothing for the Laugavegur is a solid layering system. With this, you can adapt to the weather as quickly as it changes. In a single day, you might find yourself walking through sunshine, sleet, fog, and high winds, and your clothes need to match those conditions.
Your baselayer should be moisture wicking (merino wool or synthetic fabrics). This way, all sweat can be pulled away from your body and the clothing can dry quickly. Materials like cotton will get wet and refuse to dry, threatening things like hypothermia. Even in the summer, keeping warm at the high elevations is necessary, so an insulating mid-layer made of fleece or lightweight down is recommended.
The outer layer for any solid layering system is a fully waterproof and windproof shell. On this trail, this is a requirement, not a suggestion. This is your main layer of defense against all the harsh winds and rains you’re likely to encounter.
The small accessories like a hat, gloves, and a buff can make all the difference, and they’re easy to forget! Remember the little things so you can keep the rest of your body protected and warm when the weather picks up.

Hiking Poles
On rough terrain like that found on the Laugavegur, hiking poles can be a saviour. Long descents can be brutal on the knees, and poles help reduce that strain. They can provide additional resources to maintain solid balance while hiking on the uneven terrain, and are a lifesaver on river crossings to help you stay upright and dry.

Navigation
The Laugavegur is well-marked, but a navigation system that you can use well is important, especially in this region. Fog and heavy snow can appear out of nowhere, making navigation with the trail markers nearly impossible. For this, you need to carry a paper map, a compass, and a GPS device or your smartphone with offline maps.
It’s a bad idea to rely on cell service as coverage can be totally unreliable or nonexistent in several places along the trail. If you’re using electronics, add a power bank to your packing list as well as batteries will be sucked dry in the cold temperatures.

Food and Water
This trail is truly remote and there aren’t any spots where you can resupply along the way. From the very start, you need to have all your food packed and ready for the following three or four days of hiking.
High-calorie and low-weight meals that can be easily prepared in tough conditions are the golden ticket here. Dehydrated meals are a solid option, although they are often quite pricey. Whatever you land on for meals, remember to bring plenty of snacks that are easy to eat while still walking.
Water is easy to find on the trail, but you still need to purify it with a filter or purification system. While most of the water is quite clean, it’s never a good idea to take the risk of water-borne illnesses, as it can quickly end your hike. Bring containers that can carry between 1.5 and 2 liters at a time so that you can go for long stretches if needed.

Camping or Hut Gear
If camping, bring a four-season tent (or a solid three-season one) that you know how to use and know will withstand high winds. These campsites can be quite exposed and it’s not rare to see tents flying away when left alone for a minute. In addition to a solid tent, you need a sleeping bag that’s rated for the colder temperatures you’re likely to encounter. In the middle of summer, it’s possible and likely that you’ll see below freezing temperatures in the middle of the night.
For the huts, you simply need to bring a sleeping bag and you can leave the tent at home. A great addition is a set of earplugs as you’ll be sharing space with others who may not be as quiet as you want them to be.
Finally, a compact stove, pot, fuel, lighter, and a wind shield are all necessary for cooking as open fires aren’t allowed on the Laugavegur.
Personal Items
A basic first aid kit is one of those things that can be easily overlooked and then desperately needed if something goes wrong. Include blister care, pain relief, anti-inflammatories, and any personal medications to the classic wound and injury treatments.
Other items that you should remember could be:
- Sun protection (sunscreen and sunglasses)
- Headlamp
- Emergency shelter
- Toilet paper and sealable bags
- Lightweight toiletries

Where to Stay on the Laugavegur Trail
As a more remote trail, you won’t be sleeping in hotels in small towns and villages along the way of the trek. The two options here are mountain huts and campsites. There’s no wild camping permitted on the Laugavegur Trail, so you must camp in the designated zones. You’ll either be sleeping in the hut, or camping right outside of it.
The mountain huts along the way are:
- Hrafntinnusker
- Álftavatn
- Emstrur (Botnar)
- Landmannalaugar & Þórsmörk bases
Choosing the mountain huts over camping means that you don’t need to carry a tent along with you for the entire trek. This can mean you’re much more comfortable while walking during the day, and more comfortable while sleeping at night. The drawback is, you will be sharing this space with several other hikers and you need to make a booking months in advance to guarantee a spot.
Campsites on the other hand almost always have availability. The drawback is that you need to carry a tent and will be exposed to the high winds at night without walls to protect you. If you are choosing to camp, just make sure that your tent can handle the harsh conditions that will be coming your way!
Where to Next?
- Ultimate Guides – your gateway to hiking across Europe
- Hikes & Trails – curated lists of the best hikes and local gems
- Walking Holidays – extended journeys for when a single day just isn’t enough
- General Blog – all the extras: gear reviews, planning tips, and personal stories
FAQs
How difficult is the Laugavegur Trail?
Overall, the Laugavegur is considered moderate to challenging. There are some longer days with rough terrain, unpredictable weather, and additional skills necessary for crossing rivers.
Can beginners hike the Laugavegur Trail?
While beginners could hike the Laugavegur with the right amount of preparation, it’s highly recommended that they find ways to build up experience before taking on something more remote and challenging like this trial.
Is wild camping allowed on the Laugavegur Trail?
Wild camping is not allowed on the Laugavegur. Camping is strictly limited to designated campsites outside of the mountain huts.
What gear is essential for the Laugavegur Trail?
The essentials for the Laugavegur are waterproof layers, sturdy footwear, navigation tools, food and water, along with a thorough knowledge of basic wilderness skills.
How long does it take to walk the Laugavegur Trail?
Most hikers take four days to walk the Laugavegur, but it could be done in a range from two to six days.
What is the most beautiful part of the Laugavegur Trail?
While this is subjective, many hikers talk about the black sand desert of Mælifellssandur and the transition into Þórsmörk.
Conclusion
Noted as one of the top 20 trails in the world by National Geographic, it’s no wonder that this trail is widely popular. The mosaic of rhyolite mountains, geothermal hot springs, stark black sand deserts, icy plateaus, glacier views, and lush emerald valleys, all come together to make a brilliant painting of one of the world’s most wild countries.
With the right gear and preparation, the Laugavegur offers up the experience of a lifetime in a short span of four days made up of 55 kilometers of stunning trail.