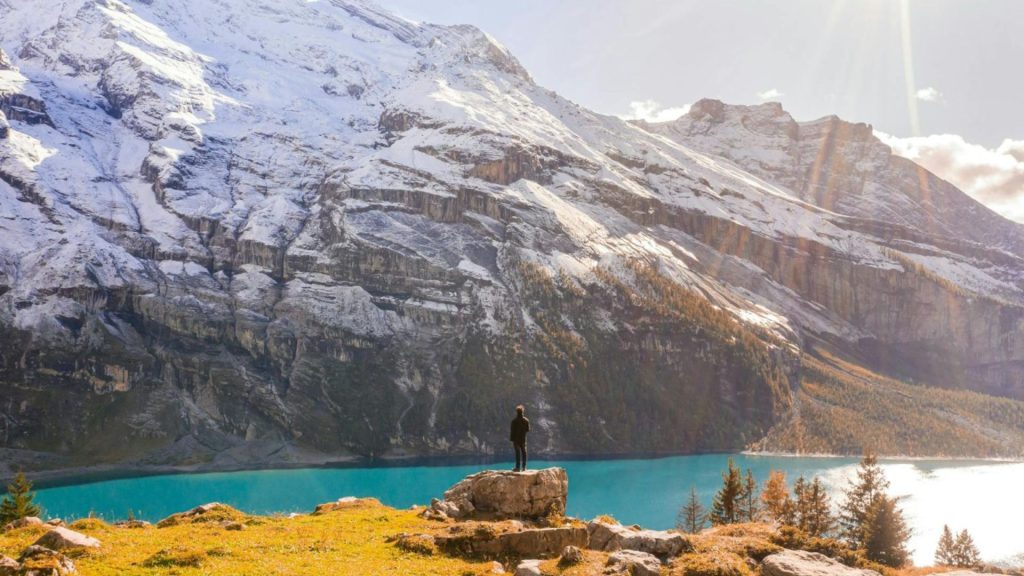
The Kungsleden Trail of the Swedish Lapland stretches for over 450 kilometers, taking you through a vast array of the character that Sweden has to offer. The huge expanse of terrain that this trail covers easily puts it on a list of the best hiking in Sweden, and all of Europe.
Taking on the Kungsleden is a huge feat for both experienced and novice hikers due to its longer length and potentially harsh conditions when not planned correctly. Either way, it’s a trail for everyone to create their own journey and adventure on. Many people take on the trail section by section, releasing the stress of having to hike 450 kilometers in one go, and then let the trail take them years to complete.
This beginners guide to hiking the Kungsleden trail in Sweden is broken down into each of those sections, along with a brief highlight of each day, making an easy-to-follow itinerary that can be adjusted for an easier or harder hike, whatever you are after. The distance can easily range from 440 kilometers to 470, depending on how you plan your hike.
This is a trail for everyone wanting to embark on an epic adventure through places like the Vindelfjällen nature reserve, the Laponia World Heritage Site, four national parks, and the headwaters of Sweden’s four national rivers. There’s so much to see, so let’s get going.
- A Brief Overview of the Kungsleden
- The Need-to-Know for Hiking the Kungsleden
- Overall Difficulty
- Navigation and Terrain on Kungsleden
- Weather on Kungsleden
- Making Your Itinerary for Hiking Kungsleden
- Kungsleden: A Section by Section Guide
- What to Pack to Hike Kungsleden
- When to Hike Kungsleden
- Getting To and From the Kungsleden
- Where to Stay Along Kungsleden
- FAQ
- Hiking The Kungsleden: A Great Challenge with Great Rewards
A Brief Overview of the Kungsleden
As one of the world’s premier long-distance hikes, the Kungsleden, translated as the King’s Trail, offers hikers a unique blend of scenery, culture, and challenge along its path. Established in the 1920s, the Kungsleden trail was slowly developed into Sweden’s most popular long-distance trail with the help of the Swedish Tourist Association.
The trail runs from Abisko in the north all the way down to Hemavan in the south, where the journey takes you through a variety of national parks, grazing lands, and cultural sites. While the entire hike is stunning, many hikers opt for the northern section from Abisko to Nikkaluokta for its scenic beauty and accessibility.
No matter what part of the Kungsleden you choose to take on, you’re in for a wild ride.
The Need-to-Know for Hiking the Kungsleden
Overall Difficulty
With its long distance and gaps in resupply, the Kungsleden is most often considered a moderate to difficult trail. The hiking itself doesn’t come with dramatic climbs and descents over rough terrain, but there are some days that demand a lot of work from the body.
The logistics of the trail can become difficult with limited resupply, such as the gap between Kvikkokk and Ammarnäs, where you need to fill up for around 130 kilometers of hiking. Otherwise, the hiking is generally pleasant, and the trail is well-maintained.
Navigation and Terrain on Kungsleden
With the dedication of the Swedish Tourist Association, hiking the Kungsleden trail is made easily accessible with well-maintained chunks of trail that lead to simple navigation. The trail is filled with boardwalks and footbridges that span kilometers of streams and wetlands that would otherwise be impassable.
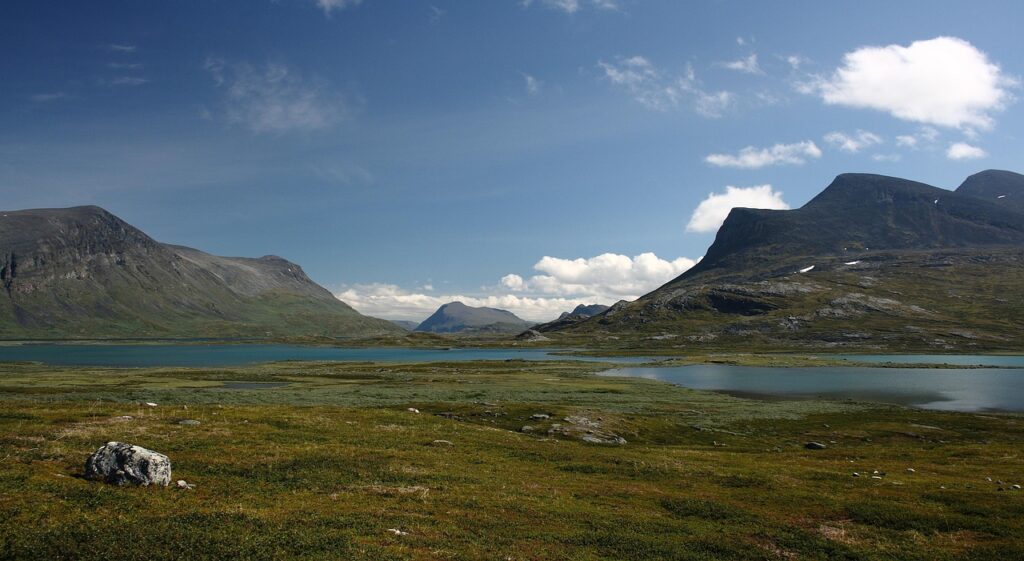
The Kungsleden passes through rocky and eroded sections as well as these wetlands and traditional Sámi land, where reindeer are herded and graze freely. Along the Tjäktja and Sälka valleys, you’ll find alpine wildflowers with mosses, shrubs, and birch forests scattered along your route.
“Avoid rookie mistakes. Our free ebook Hiking for Beginners shows you how.”
Due to the high concentration of water in the region, the trail requires the use of boats for lake crossings that would be impossible to cross without assistance. These boats are typically out and ready for transport in early July and can require some pre-planning before showing up.
The Kungsleden is typically marked with red paint on rocks or trees, as well as with “trail crosses”. These are poles topped with a red cross that are typically placed at 40-meter intervals in the mountain areas, making the trail simple to follow.
Weather on Kungsleden
The weather this far north can be unpredictable and is likely to be colder than you’d expect in the summer months. When you cross above the Arctic Circle, be on the lookout for potential snow, fog, storms, and cold nights.
Proper preparation and having the essential gear are key to getting yourself safely across the Kungsleden trail. While the trail is well-supported at times, it can become truly remote in wild terrain where you are on your own against the weather.
Making Your Itinerary for Hiking Kungsleden
There is no truly typical itinerary when hiking the Kungsleden trail. There are countless different ways to plan the hike and add your own preferences, additional challenges, or intermittent rest days along the way.
The nature of the trail breaks it into five major sections as mentioned earlier. These sections can be taken on together for a thru-hike of the Kungsleden, or can be tackled separately to spread the trail out over time.
We’ve put together a small guide for each section of the trail with optional detours, side hikes, and places where you can spend a rest day without worrying about putting more kilometers under your boots.
The first section of the trail from Abisko to Nikkaluokta is easily the most popular section for hikers looking to have easy access to the trail, see loads of dramatic alpine scenery, and still get over 100 kilometers added to their list. However, the entire hike is worth taking the leap to complete in any way you’d like. So, we’ve gone ahead and compiled a section-by-section and a day-by-day guide to hiking the Kungsleden Trail in Sweden.
Kungsleden: A Section by Section Guide
Section One: Abisko to Nikkaluokta
Distance: 105 kilometers
Elevation Loss/Gain: – 1,000 m / + 1,200 m
Average Days to Hike: 7-8 days
This signature segment of the Kungsleden is the most popular due to its accessibility, facilities, and dramatic alpine scenery. It has a bit of everything for everyone, and can be a great entrance point for beginners that aren’t ready to take on a completely different style of backpacking that throws you into vast and remote places like the later sections of this trail do.
Day 1: Abisko to Abiskojaure (15 kilometers)
The first day of the hike tosses you straight into Abisko National park where you’re surrounded by birch forests as far as the eye can see. This terrain will show up along the entire hike, but few of them can match the feeling of starting out in such a beautiful place on day one.
The forest opens up into dramatic limestone ridges with views of both Torneträsk and Lapporten, two iconic natural landmarks in Sweden. Torneträsk is a large lake that is postcard picturesque with a role in history during a British airstrike in the second World War. Lapporten is a massive U-shaped valley that you’ll find alongside Torneträsk in most pictures as its stunning backdrop.
This first day of hiking is enough for any nature lover to get their fill, but it’s still only the start.
Day 2: Abiskojaure to Alesjaure (21 kilometers)
Starting again in a birch forest, this day will move you from what feels like a crowded and dense forest into wide open moorland that borders an extended system of lakes on its eastern edge.
As soon as you leave the tree line, you climb the steep ascent up and over Kieronbacken before ending up in the moorland. Once you’re hiking along the lakes, you can make the choice to cross Alesjuare lake in order to cut six kilometers of the hike for the day.
Day 3: Alesjaure to Tjäktja (13 kilometers)
The third day of hiking brings you to the highest point on the entire Kungsleden trail, Tjäktjapasset. At around 1,150 meters above sea level, this iconic viewpoint is an early excitement for anyone on the hike.
The rest of the day leading up to the summit is filled with beautiful and meandering trails through delta landscapes that allows you to take in the beauty of the world around you rather than struggling to hike straight up or down as many long distance trails often do.
Day 4: Tjäktja to Sälka (12 kilometers)
After hitting your peak of the trail, you descend into the Tjäktjavagge valley. This valley is sheltered by steep canyon walls with the opportunity to catch vibrant summer blooms for those lucky enough to time it right.
There’s a well-stocked shop at Sälka for anyone that’s looking to resupply along the way, however it only carries the essentials and will come up short for any forgotten or damaged gear along the way. Be sure to come prepared for anything, as a lot of this trail is wild and remote, not allowing for much last minute purchasing to be done.
“Plan less, walk more.” Pick a route, set your pace, and let Europe unfold under your boots: grab your free Walking Holiday ebook today”
Day 5: Sälka to Singi (12 kilometers)
This wide alpine valley opens the eye to a dramatic landscape of glaciers and mountain peaks lining the path that you’re headed down. Along this hike, you’ll end up near the Singi cabin, but it’s worth noting that there is no shop at this stop, which is another great reminder to be prepared for anything.
Day 6: Singi to Kebnekaise Mountain Station (14 kilometers)
For anyone looking to take a side quest off the main trail, hiking up to Sweden’s highest mountain base station (Kebnekaise Fjällstation) gives you a great opportunity to acclimatize to higher altitudes and try to bag a few peaks that are in the region.
These extra hikes are totally optional and your stay can even be extended into multiple days if you are trying to summit multiple peaks before resuming hiking Kungsleden.
Day 7: Kebnekaise Station to Nikkaluokta (19 kilometers)
From the mountain station, the path takes you down a gentle descent through forest and meadows to Nikkaluokta, the end point for anyone that’s only hiking the first section of Kungsleden. Many people will take a boat across Ladtojuare Lake if you’re looking to shorten that final stretch of the trail.
Nikkaluokta has great transport links that can take you south if you are headed out after your great adventure hiking in Sweden, or if you want to skip ahead to another section of the trail and come back for section two another year.
Section Two: Nikkaluokta to Vakkotavare
Distance: 71 kilometers
Elevation Loss/Gain: – 700 m / + 800 m
Average Days to Hike: 3-4 days
The second section of Kungsleden is filled with some days that are longer than those in the first section, but can easily be split into more days. Most people will take anywhere between 3 and five days to hike all 71 kilometers between Nikkaluokta and Vakkotavare, but you can make this section your own in countless ways.
Day 1: Nikkaluokta to Kaitumjaure (20 kilometers)
The first day heading out of Nikkaluokta takes you along valleys with small lakes and gently rolling hills. The terrain is gentle, without much elevation change at all, which makes for a peaceful long day of hiking.
Day 2: Kaitumaure to Teusajaure (25 kilometers)
The second day of section two will be one that leaves you thanking the Swedish Tourist Association over and over. Wetland areas and open tundra make up the entirety of this day’s hiking where wooden planks are necessary to get over the deep mud that can be found all over.
As you approach Teusajaure Lake, the landscape becomes a bit more dramatic from the day’s typical flat walk, but holds an easy and gentle gradient along the way.
Day 3: Teusajaure to Vakkotavare (26 kilometers)
Right out of Teusajaure, you start with a boat ride across the lake. As soon as you’re off the boat, the trail takes you up a steep climb to get up to high ground where you can look in both directions to see deep valleys across the landscape.
This is one of the days that can easily be broken up and still have you hiking a decent amount each day. If you’re up for a challenge, take on all 26 kilometers in one go, or opt to slow down and enjoy the ride for another day.
Section Three: Saltoluokta to Kvikkjokk
Distance: 73 kilometers
Elevation Loss/Gain: – 750 m / + 700 m
Average Days to Hike: 5-6 days
The third section of Kungsleden takes you hiking across varied terrain from forested slopes to dramatic alpine plateaus. The route runs along the edge of Sarek National Park, offering views of the Rapadalen Delta and Skierfe cliff, one of the most iconic scenes you’ll find in the whole country.
Day 1: Saltoluokta to Sitojaure (20 kilometers)
The first day of the third section starts off with a ferry from Kebnats over to Saltoluokta, where you’ll immediately climb up from the lakeside through pine forest until you reach alpine terrain. With the elevation you gain, you’re rewarded with sweeping views of the surrounding areas before dropping down into Sitojaure.
Day 2: Sitojaure to Aktse (19 kilometers)
Today starts off with yet another boat ride where you can catch a lift across Lake Sitojaure in order to avoid long marshy sections that make trekking almost impossible. If you’re looking for a challenge, go ahead and take the trail out of town around the lake.
Once you’re on the other side of the lake, you’ll gradually climb up through forest and brush. The day isn’t a steep climb, but it definitely isn’t flat. At the top of your climb, you’ll arrive at Aktse hut, which overlooks the mouth of the Rapadalen valley, a 35-kilometer-long valley, the largest in Sarek National Park.
Optional Day Hike: Aktse to Skierge
If you want to add about 10 kilometers onto your itinerary, this is a great chance to take a side trip and catch some stunning views along the way.
From Aktse to Skierfe, the path climbs the Skierfe plateau, where it takes you to one of Sweden’s most breathtaking views. Here you can see the winding Rapa River along the delta below, a scene unlike many you’ll get to see along the rest of the hike. If you find it possible to get enough, you can head back down to Aktse to rest up for the next day’s trek.
Day 3: Aktse to Pårte (22 kilometers)
Today’s hike is less about dramatic views and more about being nestled in dense forest with a fairytale feeling. The trail crosses creeks and marshes over countless small wooden bridges until you arrive at the Pårte hut. This hut is set amidst the trees, where you can feel the shelter and the welcoming embrace of the forest around you.
Day 4: Pårte to Kvikkjokk (12 kilometers)
The final day on the third section of hiking Kungsleden is a short one. You continue to walk through the same lush forest that you were trekking through the day before, but with an end in sight. After a brief 12-kilometer hike, you’ll walk up to Kvikkjokk Fjällstation, where you’ll find easy access to resupply and transport options if this is the end of the trail for you.
Section Four: Kvikkjokk to Ammarnäs
Distance: 179 kilometers
Elevation Loss/Gain: – 2,000 m / + 2,200 m
Average Days to Hike: 10-14 days
The trek along the Kungsleden from Kvikkjokk to Ammarnäs is widely regarded as the most remote and the most challenging section of the Kungsleden. Huts are far fewer along this section than on the rest of the trail, which means you need to rely on your own self-sufficiency to get through. While the trail here is challenging, it brings about solitude, unspoiled wilderness, and the chance to see wildlife that you won’t see with other people wandering around.
Due to the lower number of huts in the area, you’ll likely end up wild camping along this section. Wild camping in Sweden is permitted, so long as you follow the general guidelines already established.
Wild camping along the Kungsleden allows for a lot of flexibility and creativity in your itinerary. You can hike 10 kilometers one day and 20 the next, all depending on how you feel. It also means you may need to rely on navigation skills a bit more due to its remoteness. This is a much less frequented section of the trail, and it’s recommended that only those who have experience in the deep backcountry attempt it.
Day 1 to 3: Kvikkjokk to Tsielejåkk (~40 kilometers)
Departing from Kvikkjokk requires heading out on another boat across the Tarra River before taking another forested ascent and a path through wetlands. From here, the walk to Tsielejåkk will push you through boggy paths with wooden walkways and dense birch forests. Valleys that have been slowly shaped by glacial erosion over the years will serve as your backdrop.
This section of the trail is also home to Sámi reindeer herders, meaning you will likely run into some along the way. There will be plenty of signs of the animals that roam these lands, which is a once-in-a-lifetime chance to see how traditional people made a living in Sweden for centuries.
Day 4 to 6: Tsielekjåkk to Vuonatjviken (~50 kilometers)
With increasingly expansive vistas, sweeping tundra, and highland terrain, the trail from Tsielekjåkk to Vuonatjviken is full of dramatic views. This stretch is dominated by lakes with several crossings necessary along the way. Some of these crossings will be with simple rowboats, but some will require you to schedule the ferry ahead of time.
At this altitude, the weather can shift in the blink of an eye. On top of that, the trail markers can be quite sparse, making it difficult to navigate this section of the trail. With basic navigation skills, you can make your way through this vast terrain that is home to silent days with pristine and untouched nature, like Sweden was long before humans arrived.
Day 7 to 9: Vuonatjviken to Bäverholm (~50 kilometers)
This 50-kilometer chunk of trail is easily the most remote section of the Kungsleden where you’ll find a sense of peace and solitude that’s hard to get these days. The trail takes you across open alpine tundra with small rocky passes and fell land without a single sign of people along the trek. There aren’t any huts in this region, nor will you find many trail markers other than old cairns and signposts that can still point you in the right way to go.
It’s rare that you encounter another hiker on this stretch, and you’ll be more likely to stumble upon a moose, ptarmigan, and plenty of eagles up in the sky. Very few long distance hiking trails in Europe offer a sense of remoteness like this chunk of Kunglseden from Vuonatjviken to Bäverholm. This is a chance for a unique trekking experience and is worth trying out for anyone wanting to get away.
Day 10 to 12: Bäverholm to Ammarnäs (~39 kilometers)
As you progress through this section of the Kungsleden, the tundra starts to give way to subalpine terrain and more birch forest. As you descend down to Ammarnäs, you’re accompanied by scenic and welcoming views with paths that start to show signs of more use.
Ammarnäs is a small spot, but has served as an important resupply point for hikers who are looking to stash up on groceries, stay in a bed for a night, and learn more about the region at a Sámi museum or other spots of cultural significance. There is available transportation to and from Ammarnäs for those who are ending their hike here to come back at another time.
Section Five: Ammarnäs to Hemavan
Distance: 78 kilometers
Elevation Loss/Gain: – 950 m / + 1,000 m
Average Days to Hike: 5-6 days
The final section of the Kungsleden is a well-maintained portion full of shorter days of hiking with a variety of different terrain along the way. You’ll find mountain passes, suspension bridges, and glacial valleys all compact into a short 78-kilometer trek. In contrast to the previous section of trail, huts are regularly spaced and you’ll encounter plenty of fellow hikers along the way.
Day 1: Ammarnäs to Aigertstugan (9 kilometers)
The first steps out of Ammarnäs put you on a steep and rewarding climb through a birch forest until you reach alpine terrain. The day is a short trek, but your legs are still sure to get a full test and warm up for the days ahead of you.
The Aigertstugan hut is perched above the valley with sweeping views of the Vindelfjällen Nature Reserve. This nature reserve is one of Europe’s largest protected areas and is worth a visit of its own when you come back to Sweden after hiking the Kungsleden.
Day 2: Aigert to Serve (19 kilometers)
Continuing to trek southward toward the end of the Kungsleden, the path takes you along rolling highland terrain that switches between open fell and small clusters of dwarf birch. The trail spans multiple streams via plank bridges as you pass through stretches of alpine moor.
Finding ptarmigan and reindeer along your hike will be a common occurrence, so be ready for some wildlife viewing! The day ends at the Serve hut which is set next to a stream in a wide open valley.
Day 3: Serve to Tärnasjö (13 kilometers)
The Kunglseden winds along lakes and across scenic ridgelines, giving you plenty of landscape to take in and appreciate along the way. Wooden suspension bridges are built to span the lake inlets and streams, making your journey easier than having to go around. The Tärnasjö hut sits on a forested inlet that you get to via one of these suspension bridges where you can rest for the night with a peaceful lakeside abode.
Day 4: Tärnasjö to Syter (13 kilometers)
Lush valleys surround the trail as you climb toward the high ground of Syterskalet. Up here, the meadows flood with wildflowers toward the end of summer, and planning your entire trip around this magnificent display of nature may just be worth it.
After hiking across rocky paths and soft tundra, you’ll arrive at the Syter hut, next to a babbling stream sitting under towering cliffs.
Day 5: Syter to Viterskalet (12 kilometers)
Many will say that the stretch from Syter to Viterskalet is one of the most scenic portions of the entire Kungsleden. The trail follows the Syterskalet Valley, a U-shaped valley carved out of thousands of years by a glacier with steep cliff faces on both sides.
Along the valley floor, the trail passes through herds of reindeer and dramatic views of the entire valley. Your final night on the trail will have you nestled inside of Viterskalet hut underneath dramatic and jagged peaks.
Day 6: Viterskalet to Hemavan (12 kilometers)
The final day on the trail brings you down a gentle descent through alpine tundra and birch forests on the approach to Hemavan. Small streams and low ridges define the route before you eventually pop out in Hemavan, the end of your hike on the Kungsleden.
Hemavan has just about everything you may need. There are hotels and restaurants aplenty, and you can easily transit out to get back home for a well-deserved rest. This spot is perfect for a comfortable celebration to the end of your long trek on the Kungsleden.
Choosing a Guide for Hiking Kungsleden
Many hikers choose to hike the Kungsleden independently, but hiring a guide can do a lot for your experience as well. For any beginners who are new to hiking long-distance trails or hiking in Arctic environments, guides can help you nail down logistics and take care of certain aspects of the trip that could be easily missed for novice planners.
Guided tours will come along with expert knowledge of the trail and the region it passes through. You’ll be much more likely to learn all about the indigenous people of the area, the native flora and fauna, and the history of the region. In addition to knowledge, guides tend to take on most of the logistical support that can be helpful especially if you are new to hiking in remote areas.
Not sure if you like guided tours? Check out the pros and cons between guided and self-guided tours.
🗒️ Free Checklist: “Never forget the essentials — grab your free Ultimate Hiking Packing List.”
What to Pack to Hike Kungsleden
For a huge trek like this, packing everything you need without packing more than you need is a tricky balance that is perfected only by those who have been trekking long distances for years. You learn quickly what you use every day and what could have been left behind, but sometimes it’s better to have something and not need it than to need it and not have it.
This is just a brief guide of what you may want to pack for hiking the Kungsleden in Sweden. It is by no means a complete list, and it will change for each individual hiker as many form their preferences for what to hike with over the years.
Bag Weight
In general, you can expect to hike with a bag that fluctuates between ten and fourteen kilograms if you are able to resupply at huts along the way. During the more remote stretches of trail, you’ll have a heavier pack due to the need to carry more food to complete the larger stretches without a resupply point along the way.
Insect Protection
Mosquitoes can be a huge nuisance in the Arctic. They tend to be bigger, and more dense in these regions during certain times of the year. It’s best to come as prepared as possible for mosquitoes so you can avoid both uncomfortable itchiness and the annoyance they create just by their presence.
It’s recommended to pack both a bug net and repellent. A head net can also be a good idea if you are going in the late summer, especially near Aktse and the forested region of Kvikkjokk.
Navigation Tools
Most of the Kunglseden is well-marked, but some of the more remote regions are lacking trail markers and maintenance that can help guide the way. Even in the more popular regions, carrying a map is a good idea for the off chance that you encounter a region without many markings. If you ever get lost, a map or a GPS will be a crucial tool to help you get back on track.
A compass and map are a great set of tools that are reliable and lightweight. If you are willing to carry more weight, a GPS device can serve as a good option. GPS apps tend to be tricky due to the lack of good cell phone signal in the more remote regions, and even on some of the more popular chunks of the Kungsleden.
STF Membership
Most of the huts on the Kungsleden are run by the STF (Svenska Turistföreningen), so a membership can be worth the investment. This runs about 450 SEK (around 40 Euros), and gives you a significant discount on accommodation and boat transfers. If you’re hiking the whole trail, it can end up paying for itself easily.
This isn’t a required part of hiking the trail, but it can just make things a bit easier for you if you’re tackling the entire Kungsleden.
Layers

The weather above the Arctic circle will change dramatically and quickly. The key to keeping yourself dry and warm in this environment is to have a solid layering system for your clothing rather than relying on a single thick jacket that does it all. There will be moments when you want just a t-shirt, and moments where you may wonder how it became winter in the blink of an eye.
A good layering system consists of a baselayer, a midlayer, an outer insulation layer, and an outer waterproof shell. Baselayers made of merino wool tend to be favored by many distance hikers and middle layers made of synthetic materials, or also of wool.
A waterproof outer layer for both your top and bottom is incredibly important to keep you dry, but it can also help trap heat and keep you warm if the temperature drops. Something breathable like Goretex tends to be the best bet for this layer so you can keep hiking without building up a lot of condensation as you sweat and move that turns into ice when you stop.
Hiking Shoes
A solid set of hiking shoes can make all the difference on a long hike like the Kungsleden. For the most part you have two options here. One is a set of solid and sturdy hiking boots that are leather or Goretex, or even a non-waterproof option can still be a good choice. Hiking boots can provide a lot more ankle support than their counterparts and can be more waterproof as well.
The drawback of waterproof hiking boots is that once they get wet on the inside, it’s nearly impossible to get them dry again. This can cause a lot of rubbing and blistering for your feet, which can make the hike quite miserable. Hiking boots can also be quite heavy if you’re trying for a lightweight trip.
Trail runners are the other go-to option for long distance hikers. Many people prefer them because they are lightweight and breathable, meaning that they dry faster and tend to be more comfortable. Waterproof trail runners are also an option, but will struggle to dry quickly when the inside gets wet.
Sleeping Gear
Wild camping on the Kungsleden is something that will happen quite regularly if you are tackling certain sections. If you are sticking to the more well-maintained sections, you can stay at huts but will still want to bring the proper sleeping gear.
It’s recommended to pack a sleeping bag and sleeping pad, even though many of the huts will have mattresses. Depending on the time of year, you may consider packing a tent so that you can be more flexible with where you stay and have the option to pitch a tent outside of a hut in case they are full.
It can get quite cold at night, so carrying a sleeping bag liner to help keep you warm on those nights can be a good idea that doesn’t add much space or weight to your bag.
First-Aid Kit
A basic first aid kit can go a long way in keeping you safe on remote trails. Sometimes the difference between a hospital run and a self-managed injury can be how you treat it in the first few hours, so having the right gear to take care of it will be important from the very start.
In your first aid kit, you’ll want to include the following:
- Adhesive bandages for minor cuts, blisters and other abrasions.
- Blister treatment: Blister tape or Moleskin (or other brands such as Compeed or Leukotape strips)
- Antiseptic wipes: alcohol pads are also useful, but antiseptic wipes, soap and water, or iodine is now the preferred treatment for wounds.
- Tweezers: useful for removing splinters and ticks as well as debris from open wounds
- Medical tape: even the best adhesive bandages will come off in rough environments and having additional tape will help keep them in place.
- Non-stick gauze: helpful for large wounds
- Pain relievers: Ibuprofen or Paracetamol will go a long way when you have any amount of serious pain in the backcountry
- Antihistamines: an allergic reaction can be deadly in the backcountry and a Benadryl or Loratadine tablet can save you or simply relieve the itch of a bad bug bite.
- Personal medication: any medication that you take on the daily needs to be packaged and it can be a good idea to label them in case of an emergency if someone else is accessing your first aid kit.
Pack all of your first aid kit in a ziploc or waterproof pouch so that you can keep everything protected and dry even on the wettest days on the trail.
When to Hike Kungsleden
The best time to hike Kungsleden is any time between late June and mid-September. This ensures that you have warm enough temperatures without the threat of heavy snowfall on the higher mountain passes. July and August have the most reliable weather with long stretches of daylight.
Huts along the Kungsleden tend to be open from late June to mid-September simply due to accessibility. The lush alpine meadows, flowing rivers, long evenings, and wildflowers all peak at this time of year which makes it one of the most beautiful times to be out there.
If you’re planning a full traverse, timing is key to completing your hike. The snow in the southern sections will melt much earlier than that in the north. That means that section hikers looking to complete the southern sections could try for a hike in early June, but starting up north you may want to wait a few more weeks.
July and August have mild temperatures fluctuating between 10 and 20°C complimented by long days that characterize the Arctic summers. Early July can still have some lingering snow in the high passes, but will likely be passable. It’s best to check trail conditions before these high areas at the huts preceding them. August has a higher chance of rain, while September is quieter and cooler, but huts begin to close due to early chances of snowfall.
Hiking in September can be perfect for anyone looking for solitude, but you will also need to be more self-sufficient and prepared for colder and more variable weather conditions.
Getting To and From the Kungsleden
Accessing the trail is simple due to Sweden’s efficient public transit system. The northern end of the trail in Absiko is easily reached by overnight trains or a flight to Kiruna from Stockholm with a short bus or train ending in Abisko. If you are starting in Hemavan, you can fly to Umeå and then hop on a bus. Kvikkjokk, Ammarnäs, and Saltoluokta are all accessible via bus, boat, taxi, train, and domestic flights, but the planning can be more of a challenge with less options available.
Getting back to Stockholm or any other large airport will be just as easy when you end in Hemavan or somewhere else along the route. If you’re section hiking the trail, some spots can be more remote and you need to coordinate carefully with buses or private transport because the transport timetables can change frequently outside of peak season.
Where to Stay Along Kungsleden
The network of STF huts along the Kungsleden is well-built and maintained, making them the best option for where to rest your head while hiking the trail on almost any section. This is a great choice to be comfortable while also finding incredibly scenic spots along the trail as the huts are positioned intentionally in beautiful areas. Most of the huts are spaced anywhere between 10 and 25 kilometers apart with all the basics that you need. Some huts even have wood-fired saunas, which you’ll find to be more common in the north.
While the huts have a decent amount of space, they operate on a first-come, first-served basis, with priority given to STF members. On more popular sections like the first from Abisko to Nikkaluokta, you can reserve beds ahead of time online, or try your luck walking in.
South of Kvikkjokk, you’ll find the number of huts to drop significantly. Between here and Ammarnäs, there are no STF huts so you need to wild camp or stay at private cottages or hostels when available.
Wild camping is both legal and encouraged by Sweden’s Right of Public Access, so long as you stick to Leave No Trace principles. If you carry a lightweight tent or tarp, wild camping along the entire route is totally possible because you get the option of flexibility and safety when the weather might turn and keep you from reaching the next hut.
FAQ
How long does it take to hike the Kungsleden?
Thru-hiking the Kungsleden trail in Sweden can take between three and four weeks, depending on the pace you set and the weather you encounter. Many hikers choose to take on the trail section by section where they hike for anywhere between five and ten days at a time and then return later to complete the others.
How difficult is Kungsleden?
Overall, the Kungsleden is considered moderately challenging. There is no technical terrain, but there are long days and some sections of the trail are incredibly remote and require a solid foundation of backcountry skills.
Do you need sleeping bags in huts on the Kungsleden trail?
Yes. The STF huts do not provide any bedding, so you need to carry a sleeping back or liner with you on the hike. Inside of the huts, a lightweight summer sleeping bag is usually warm enough.
What month is best for Kungsleden?
August is usually the best month due to less mosquitoes, moderate temperatures, long light, open huts, and more stable weather. Late July is also quite pleasant and September is another great choice to see the autumn colors, although you have the risk of early snow.
How to prepare for Kungsleden?
Training can be necessary for hiking the Kungsleden if you aren’t used to long days of hiking with weight on your back. Long day hikes with a loaded pack while breaking in the shoes that you’ll hike the trail in is typically the best training so you get to know your gear. Some shorter overnight trips can help you know what will be helpful and what may be excessive to bring along.
Hiking The Kungsleden: A Great Challenge with Great Rewards
No matter how you choose to go about it, the Kungsleden trail in Sweden is one of Europe’s best. It brings dramatic and beautiful scenery in wildly remote sections of the country that many people never get the chance to see. The walking can be long but pleasant, the weather can be both perfect and tough, and the huts along the way can be an experience of their own.
The Kungsleden route will give you a taste of everything you want out of a good long-distance hike in Europe. From when you get the Kungsleden start and finish in Hemavan, you’ll come out a different person, and only for the better.